iOS Certificates and Provisioning Profiles
You’ll need an Apple Developer account (Individual or Organization). See comparing memberships.
Registering your App ID
Every app must register an ID with Apple.
- Navigate to Certificates, Identifiers & Profiles › Identifiers › App IDs in the Apple Developer Center and register a new App ID.
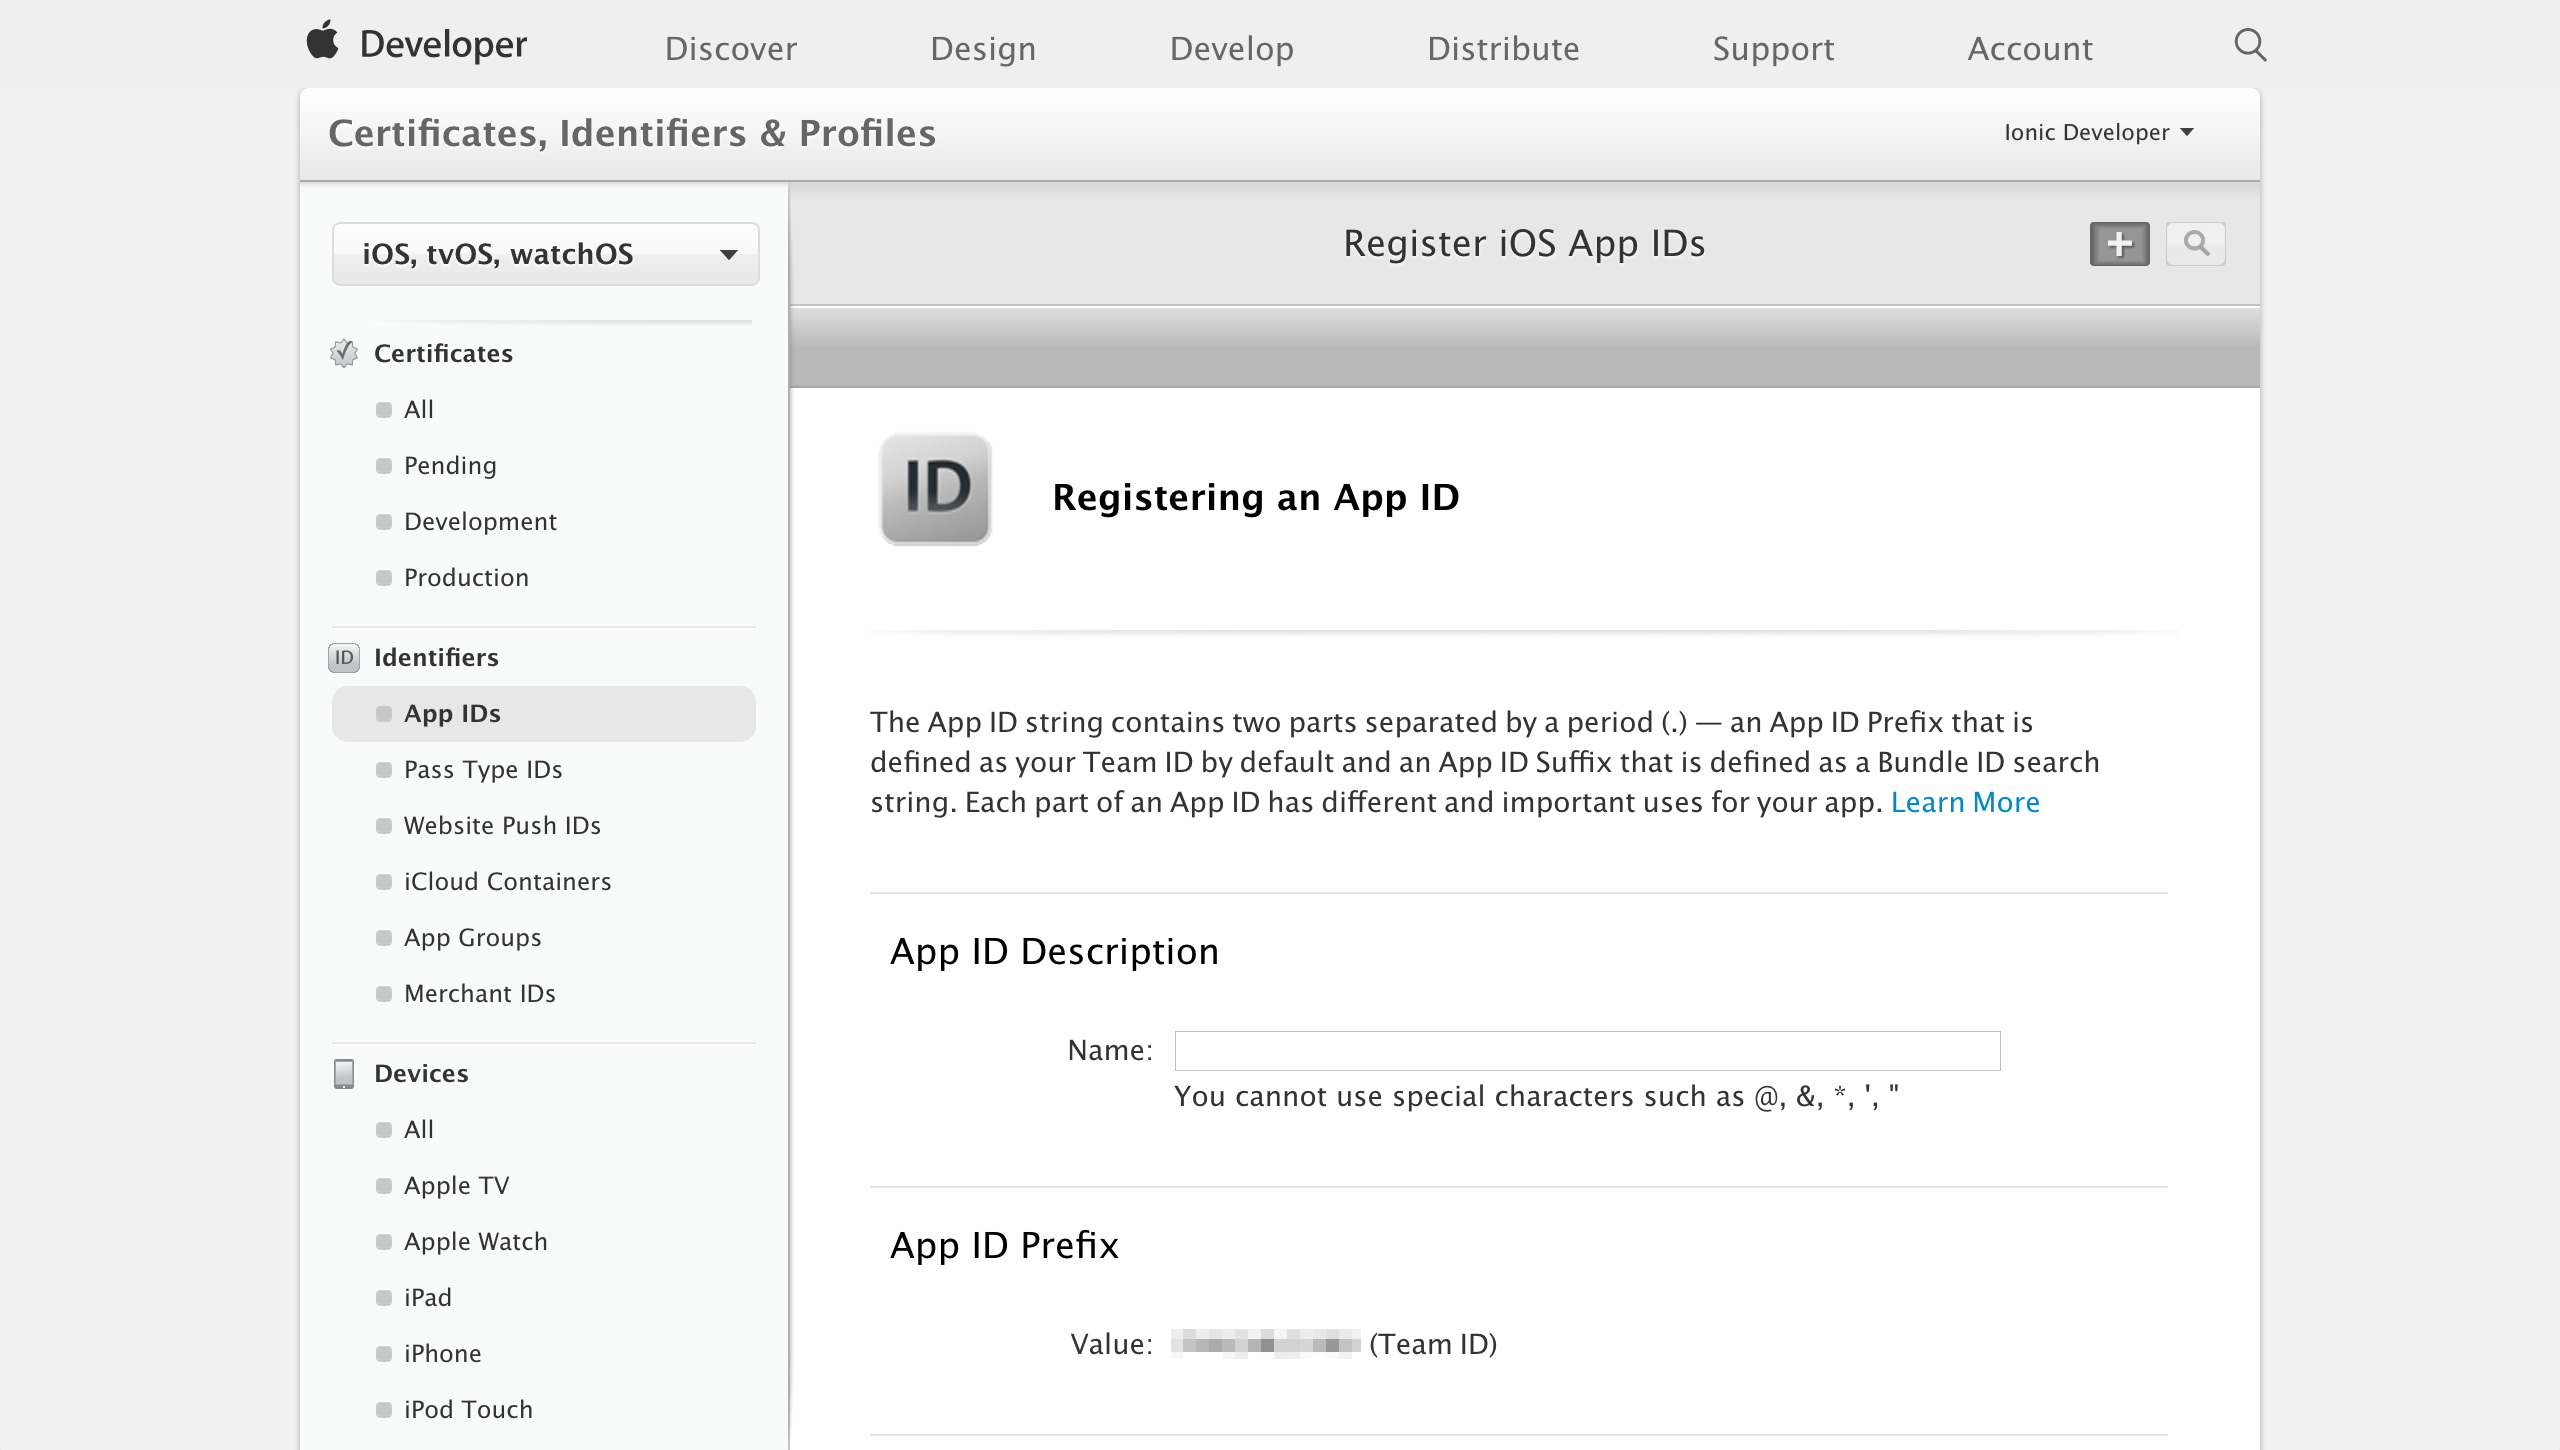
- Under Explicit App ID, set the Bundle ID to the ID you’ve specified in your app’s
config.xmlfile. iOS Bundle IDs are represented as a reversed address, such ascom.ionicframework.MyIonicApp.
Device Registration
Devices must be explicitly registered with Apple for sending push notifications during development.
- Navigate to Certificates, Identifiers & Profiles › Devices › All in the Apple Developer Center and register a new Device.
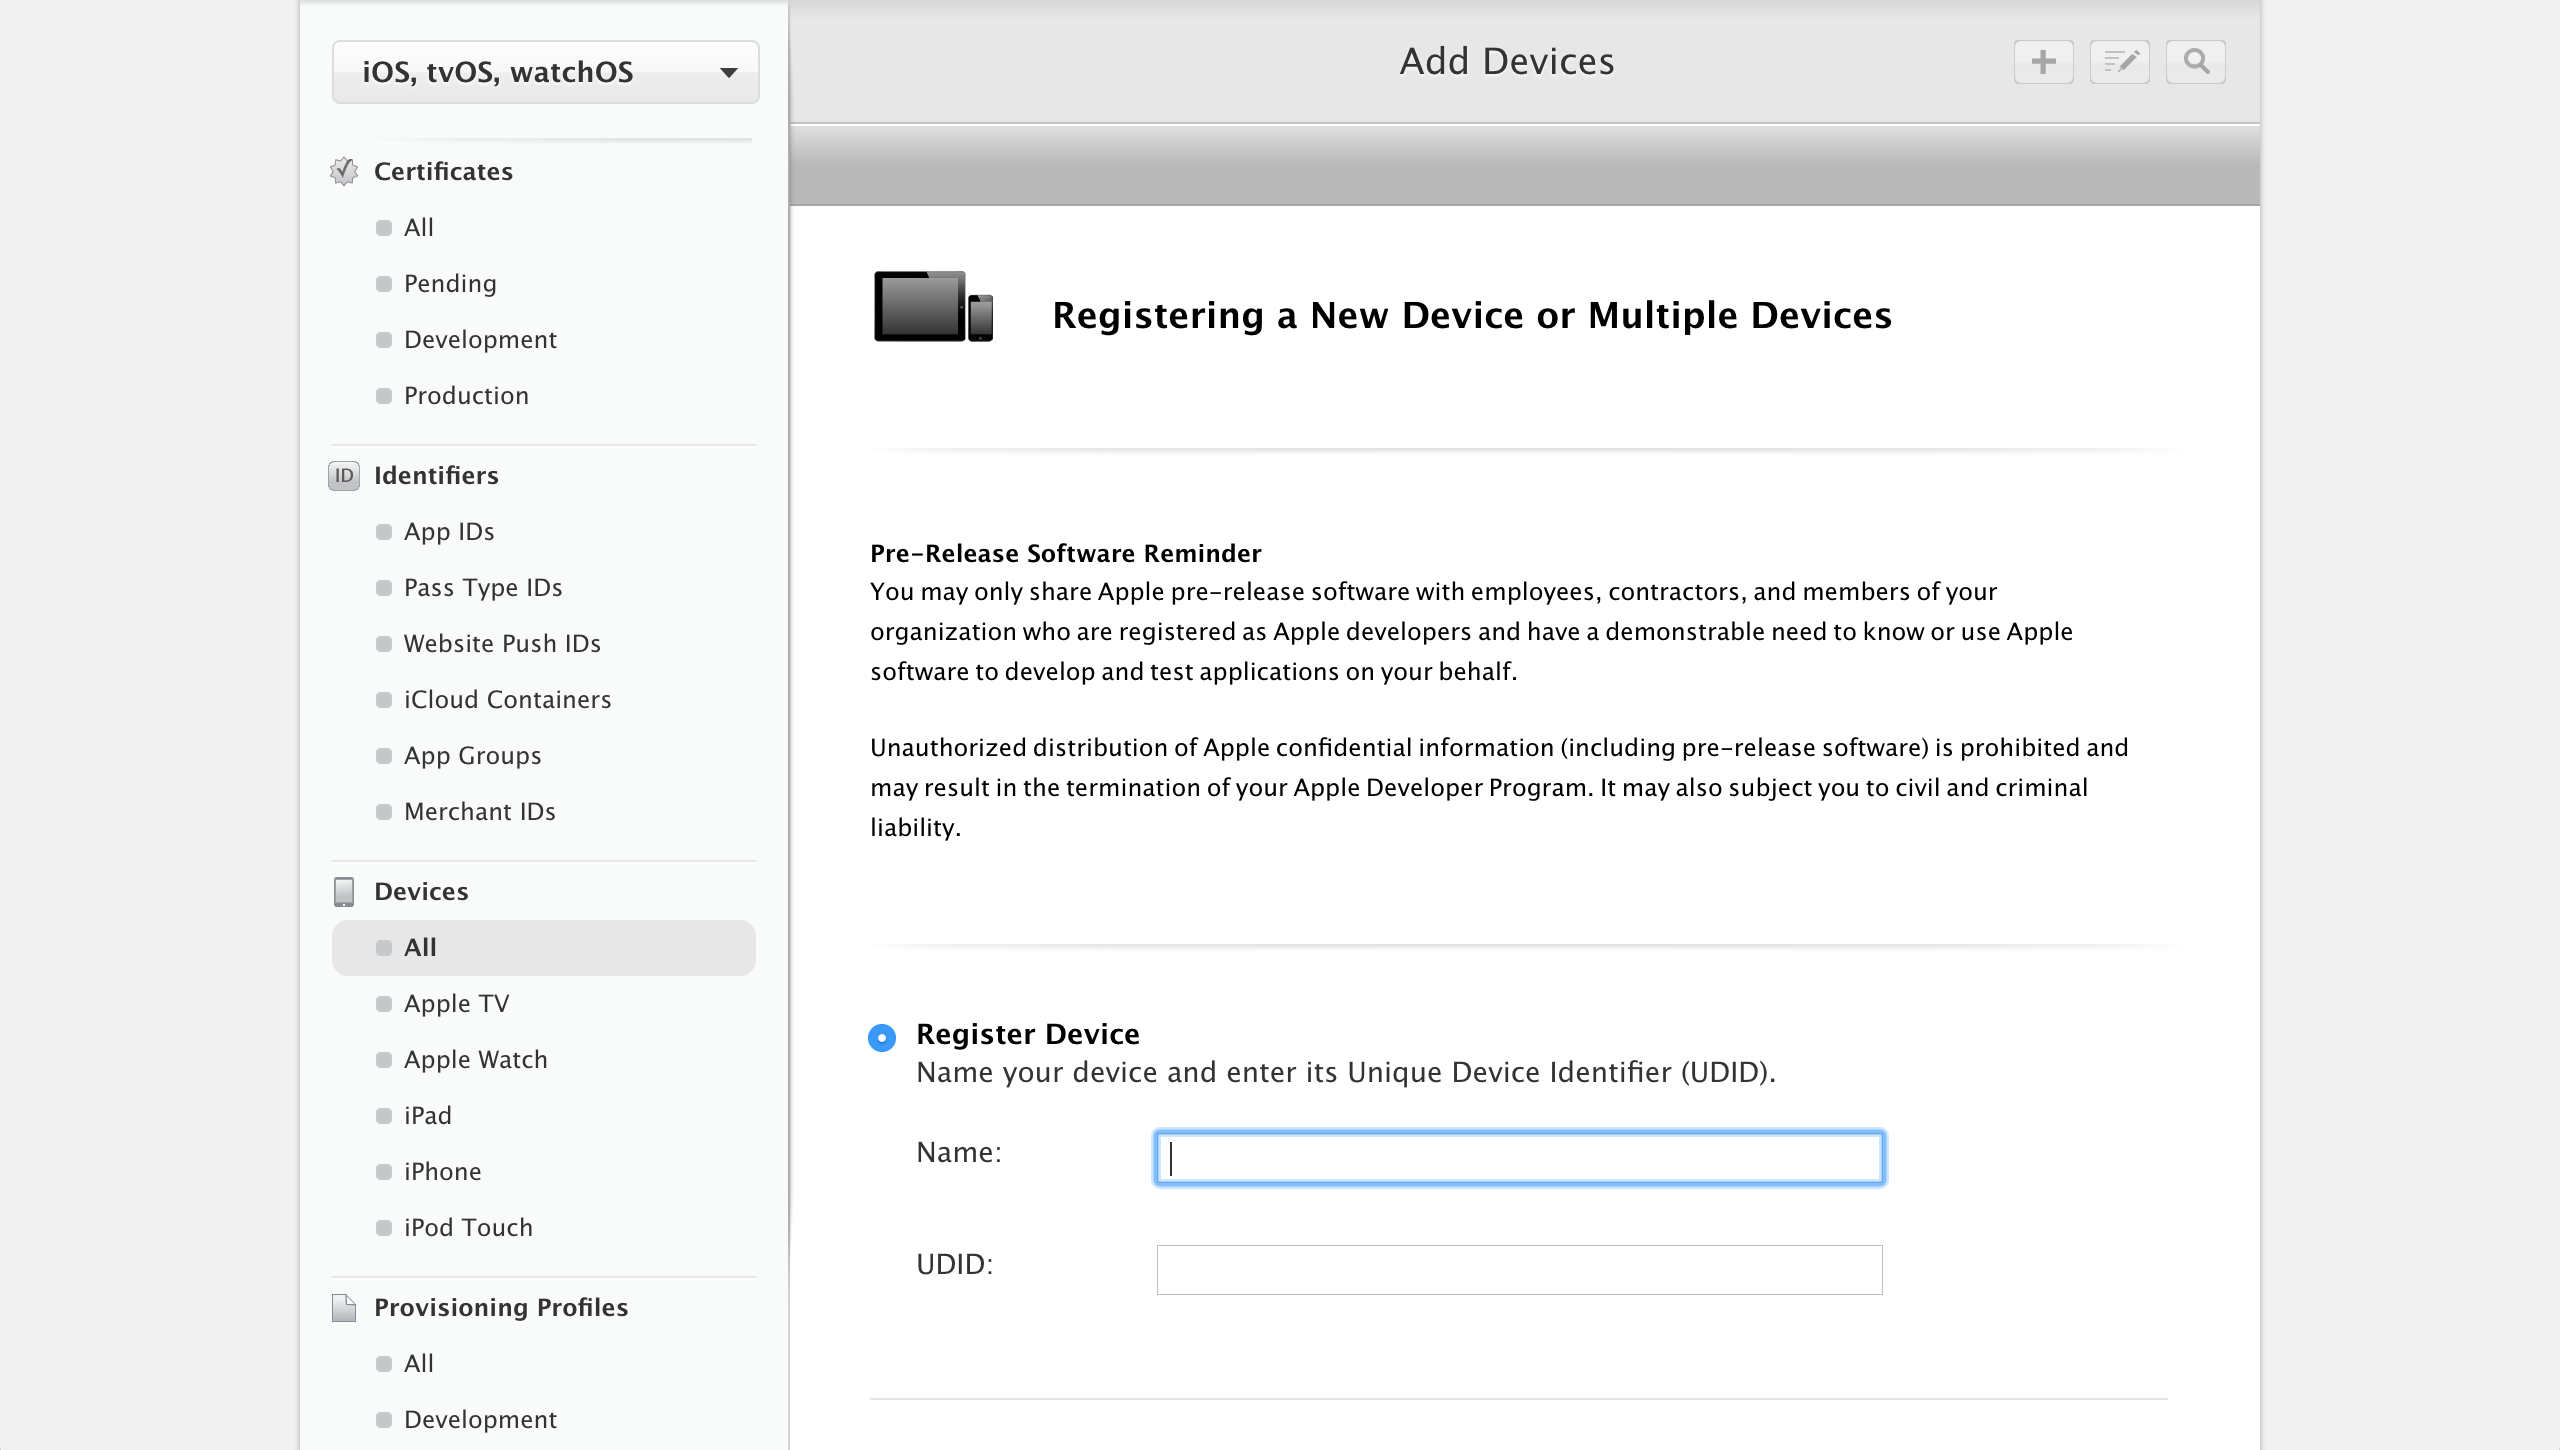
- Give your device a name and enter the device’s UDID. Find your UDID.
Certificate Signing Request
Before you can get a certificate from Apple, you’ll need to generate a certificate signing request file. It can be created on Mac OSX by using Keychain Access and on other platforms by using OpenSSL.
Using Keychain Access
- Navigate to Keychain Access › Certificate Assistant › Request a Certificate From a Certificate Authority on your Mac.
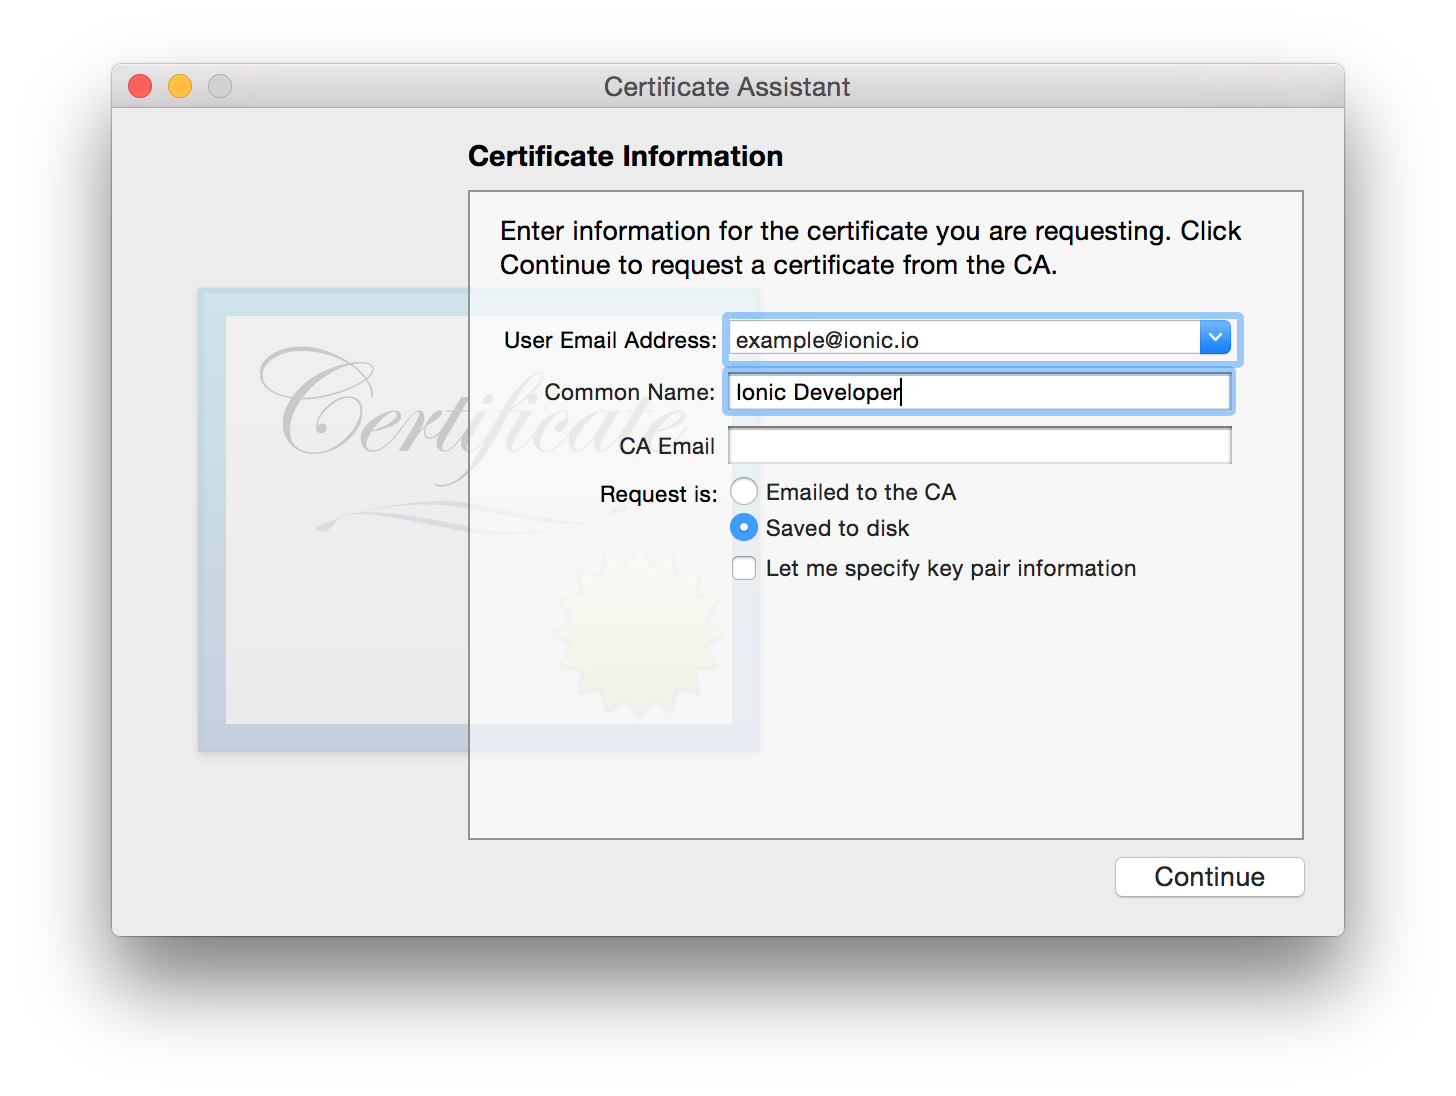
- Enter your name and email address. Leave the CA Email blank.
- Select Saved to disk and hit continue. This will generate your
.certSigningRequestfile.
Using OpenSSL
- Generate a private RSA key file.
$ openssl genrsa -out keyname.key 2048
- Create the certificate signing request file by filling out the interactive form.
$ openssl req -new -key keyname.key -out CertificateSigningRequest.certSigningRequest
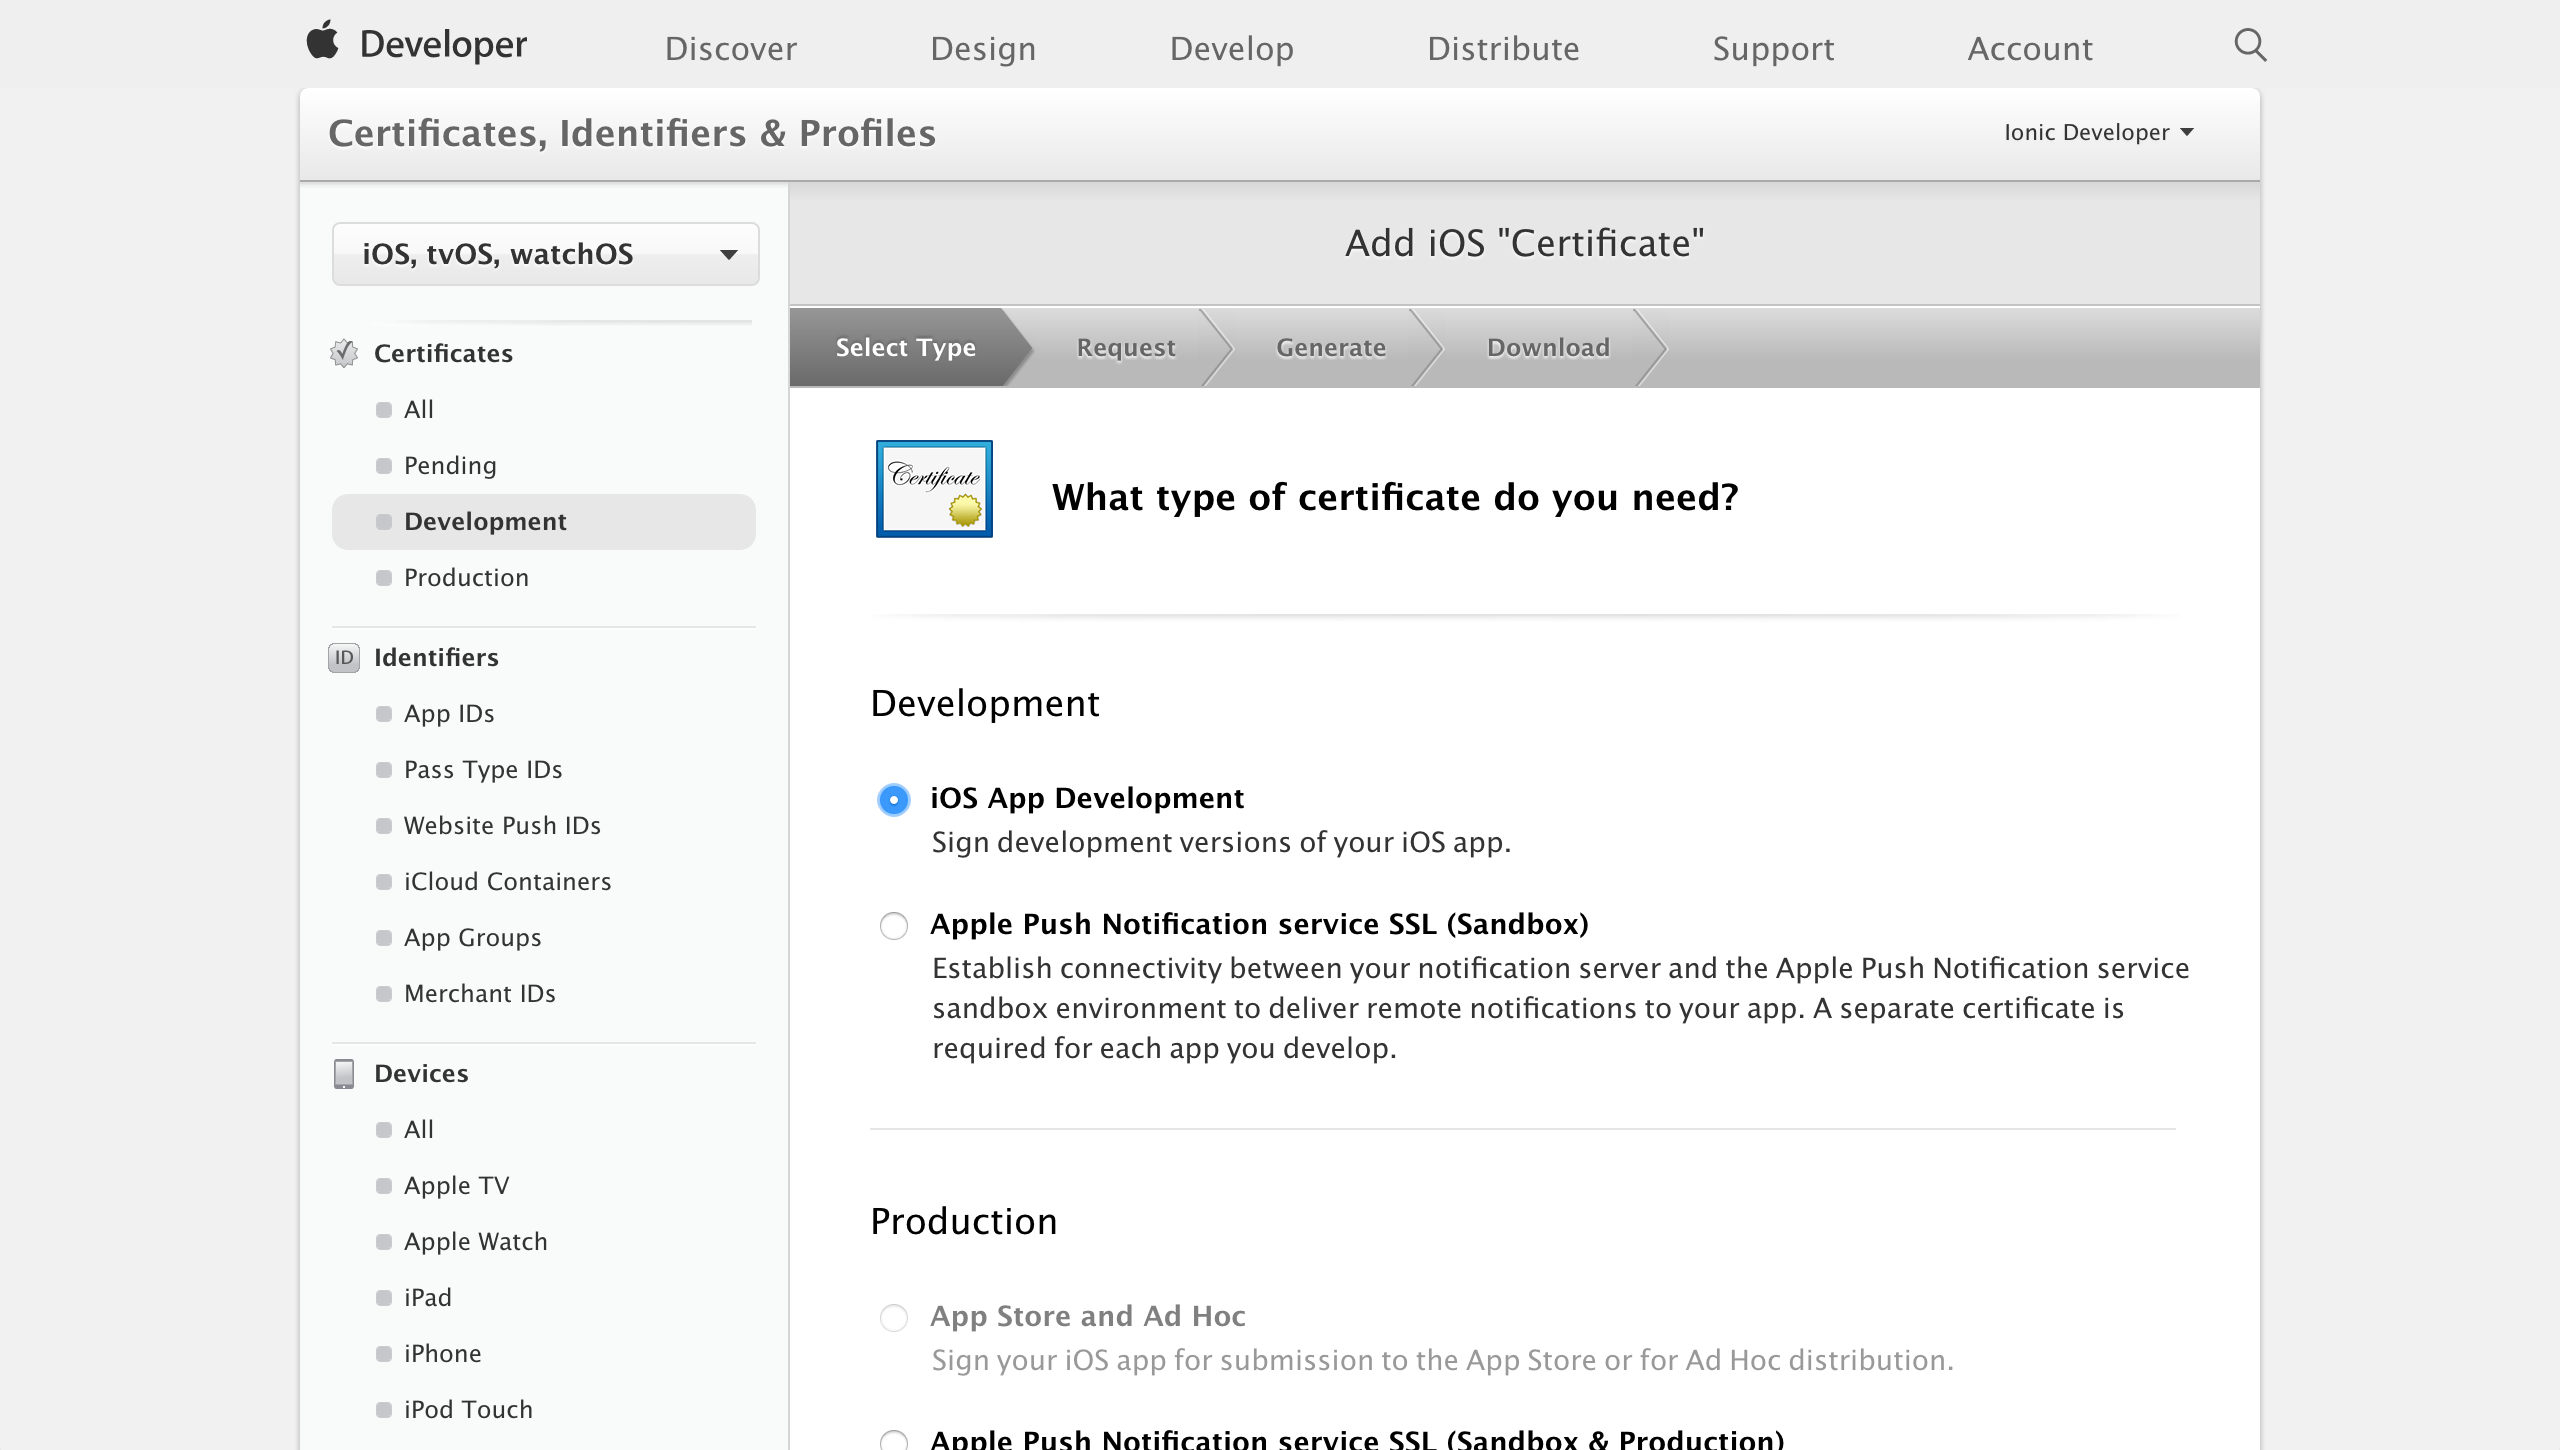
iOS App Certificate & Provisioning Profile
Before you can generate App Certificates & Provisioning Profiles, you’ll need to register your app and any devices, and obtain a .certSigningRequest.
App Certificates & Provisioning Profiles are for signing your app and giving it access to certain devices.
Certificate
There are two types of Apple certificates: development and production. We’ll guide you through generating credentials with a development certificate.
- Navigate to Certificates, Identifiers & Profiles › Certificates › Development in the Apple Developer Center and create a new certificate. Under Development, select iOS App Development.
- Step through the steps. Upload the
.certSigningRequestyou created to generate a certificate. Then, download your certificate. It should be a.cerfile.
Next, we’ll need to convert the certificate from a .cer file to a .p12 file. It can be converted on Mac OSX by using Keychain Access and on other platforms by using OpenSSL.
Using Keychain Access
- Drag your
.cerfile into your login keychain. - Right click on your imported certificate and click Export.
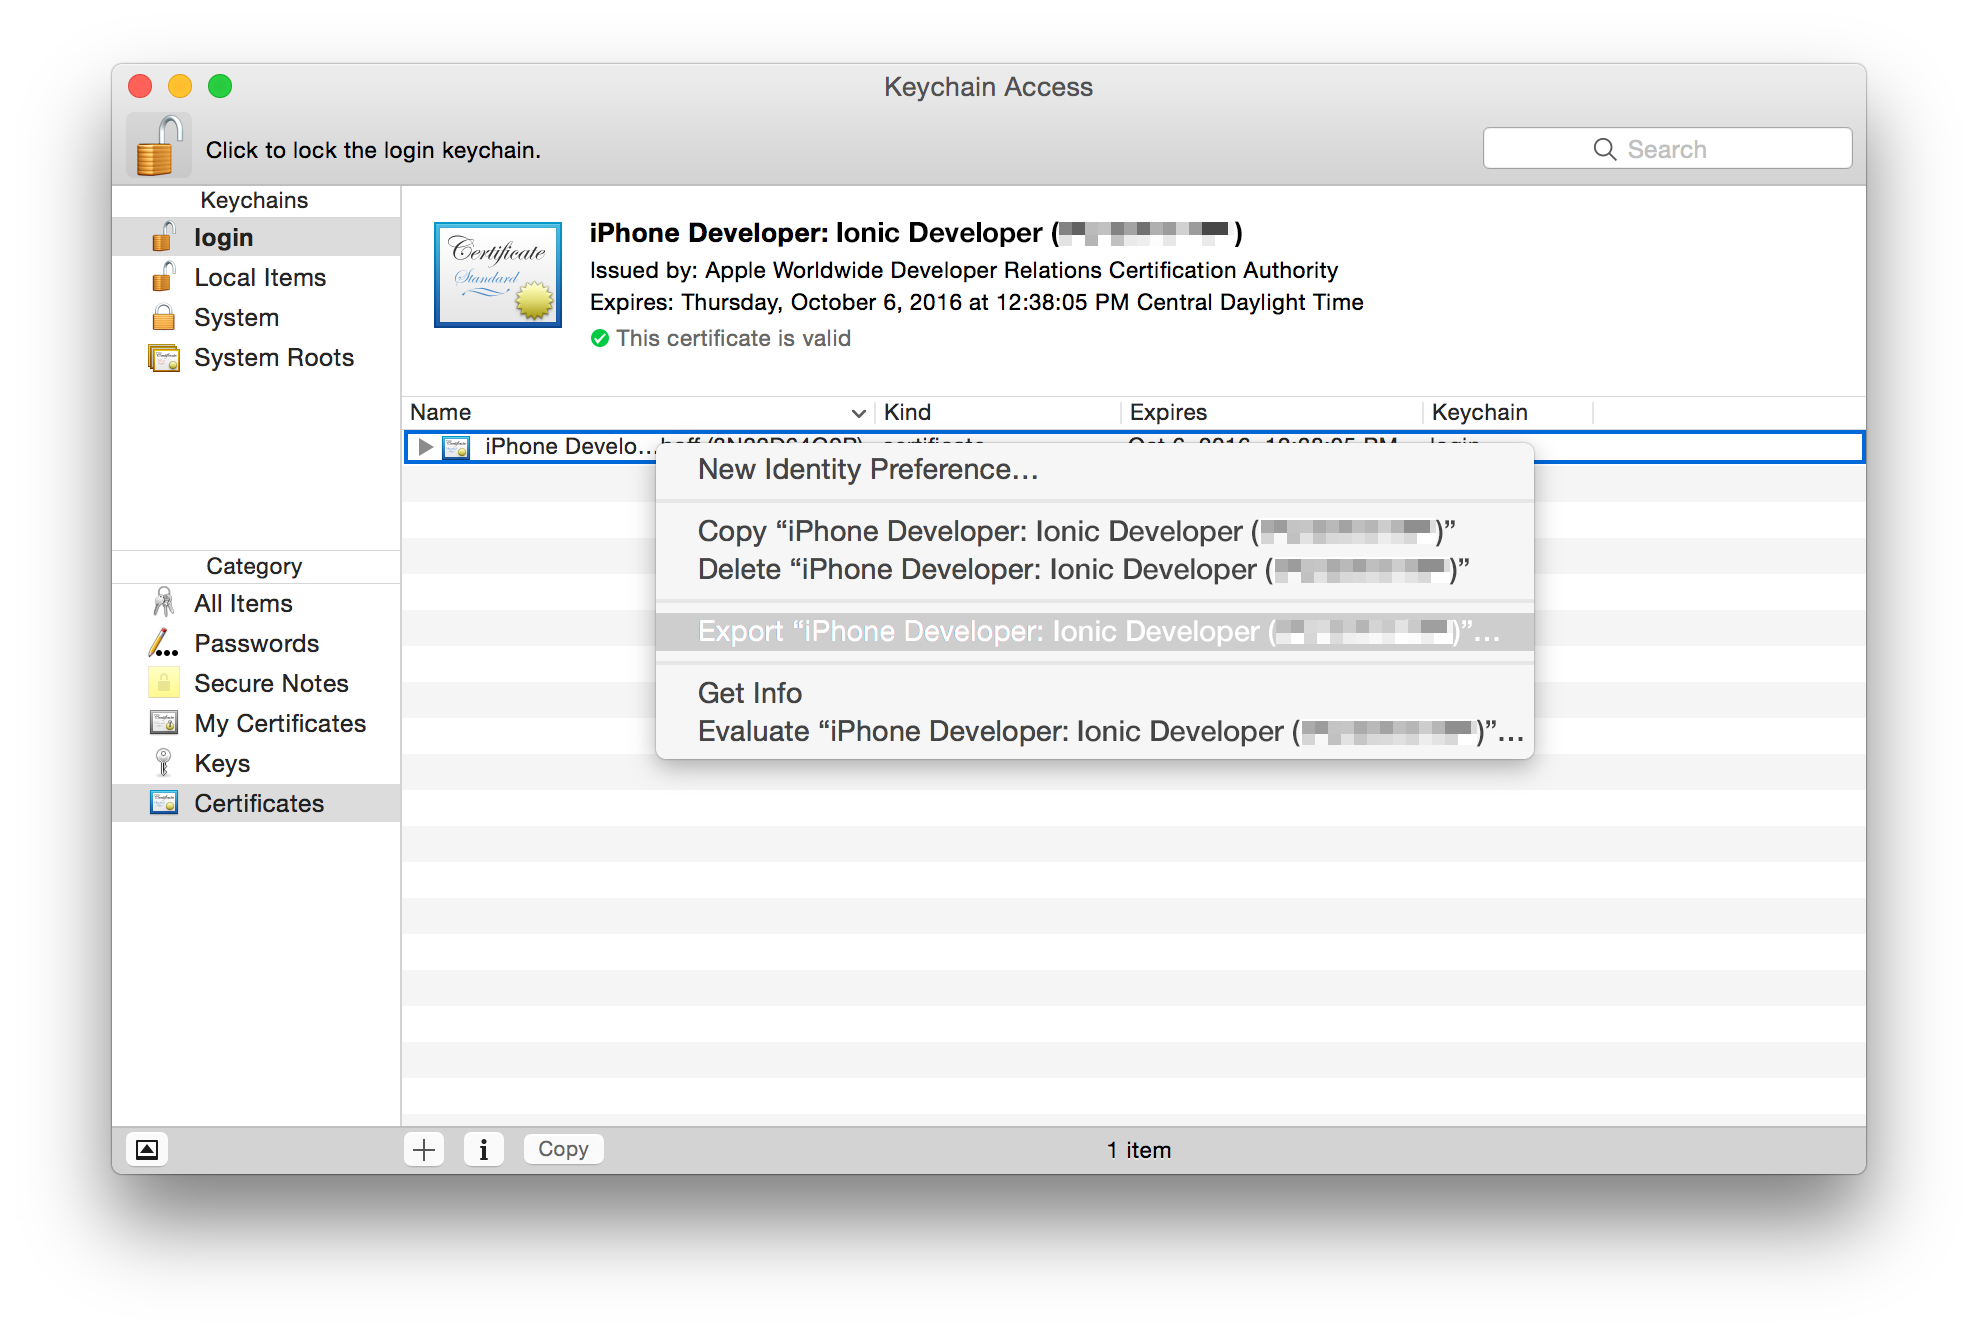
- Select Personal Information Exchange (.p12) for File Format.
- Save the certificate, giving it a strong password.
Using OpenSSL
- Download your iOS certificate to the same directory as your private RSA key.
- Change the format of the iOS certificate to PEM.
$ openssl x509 -inform DER -outform PEM -in ios_development.cer -out ios_development.cer.pem
- Export the certificate as a
.p12file, giving it a strong password.
$ openssl pkcs12 -export -inkey keyname.key -in ios_development.cer.pem -out Certificates.p12
Provisioning Profile
Provisioning profiles give your app access to be installed, or provisioned, on specific devices. For iOS App Development provisioning profiles, devices are selected manually.
- Navigate to Certificates, Identifiers & Profiles › Provisioning Profiles › Development in the Apple Developer Center and create a new provisioning profile.
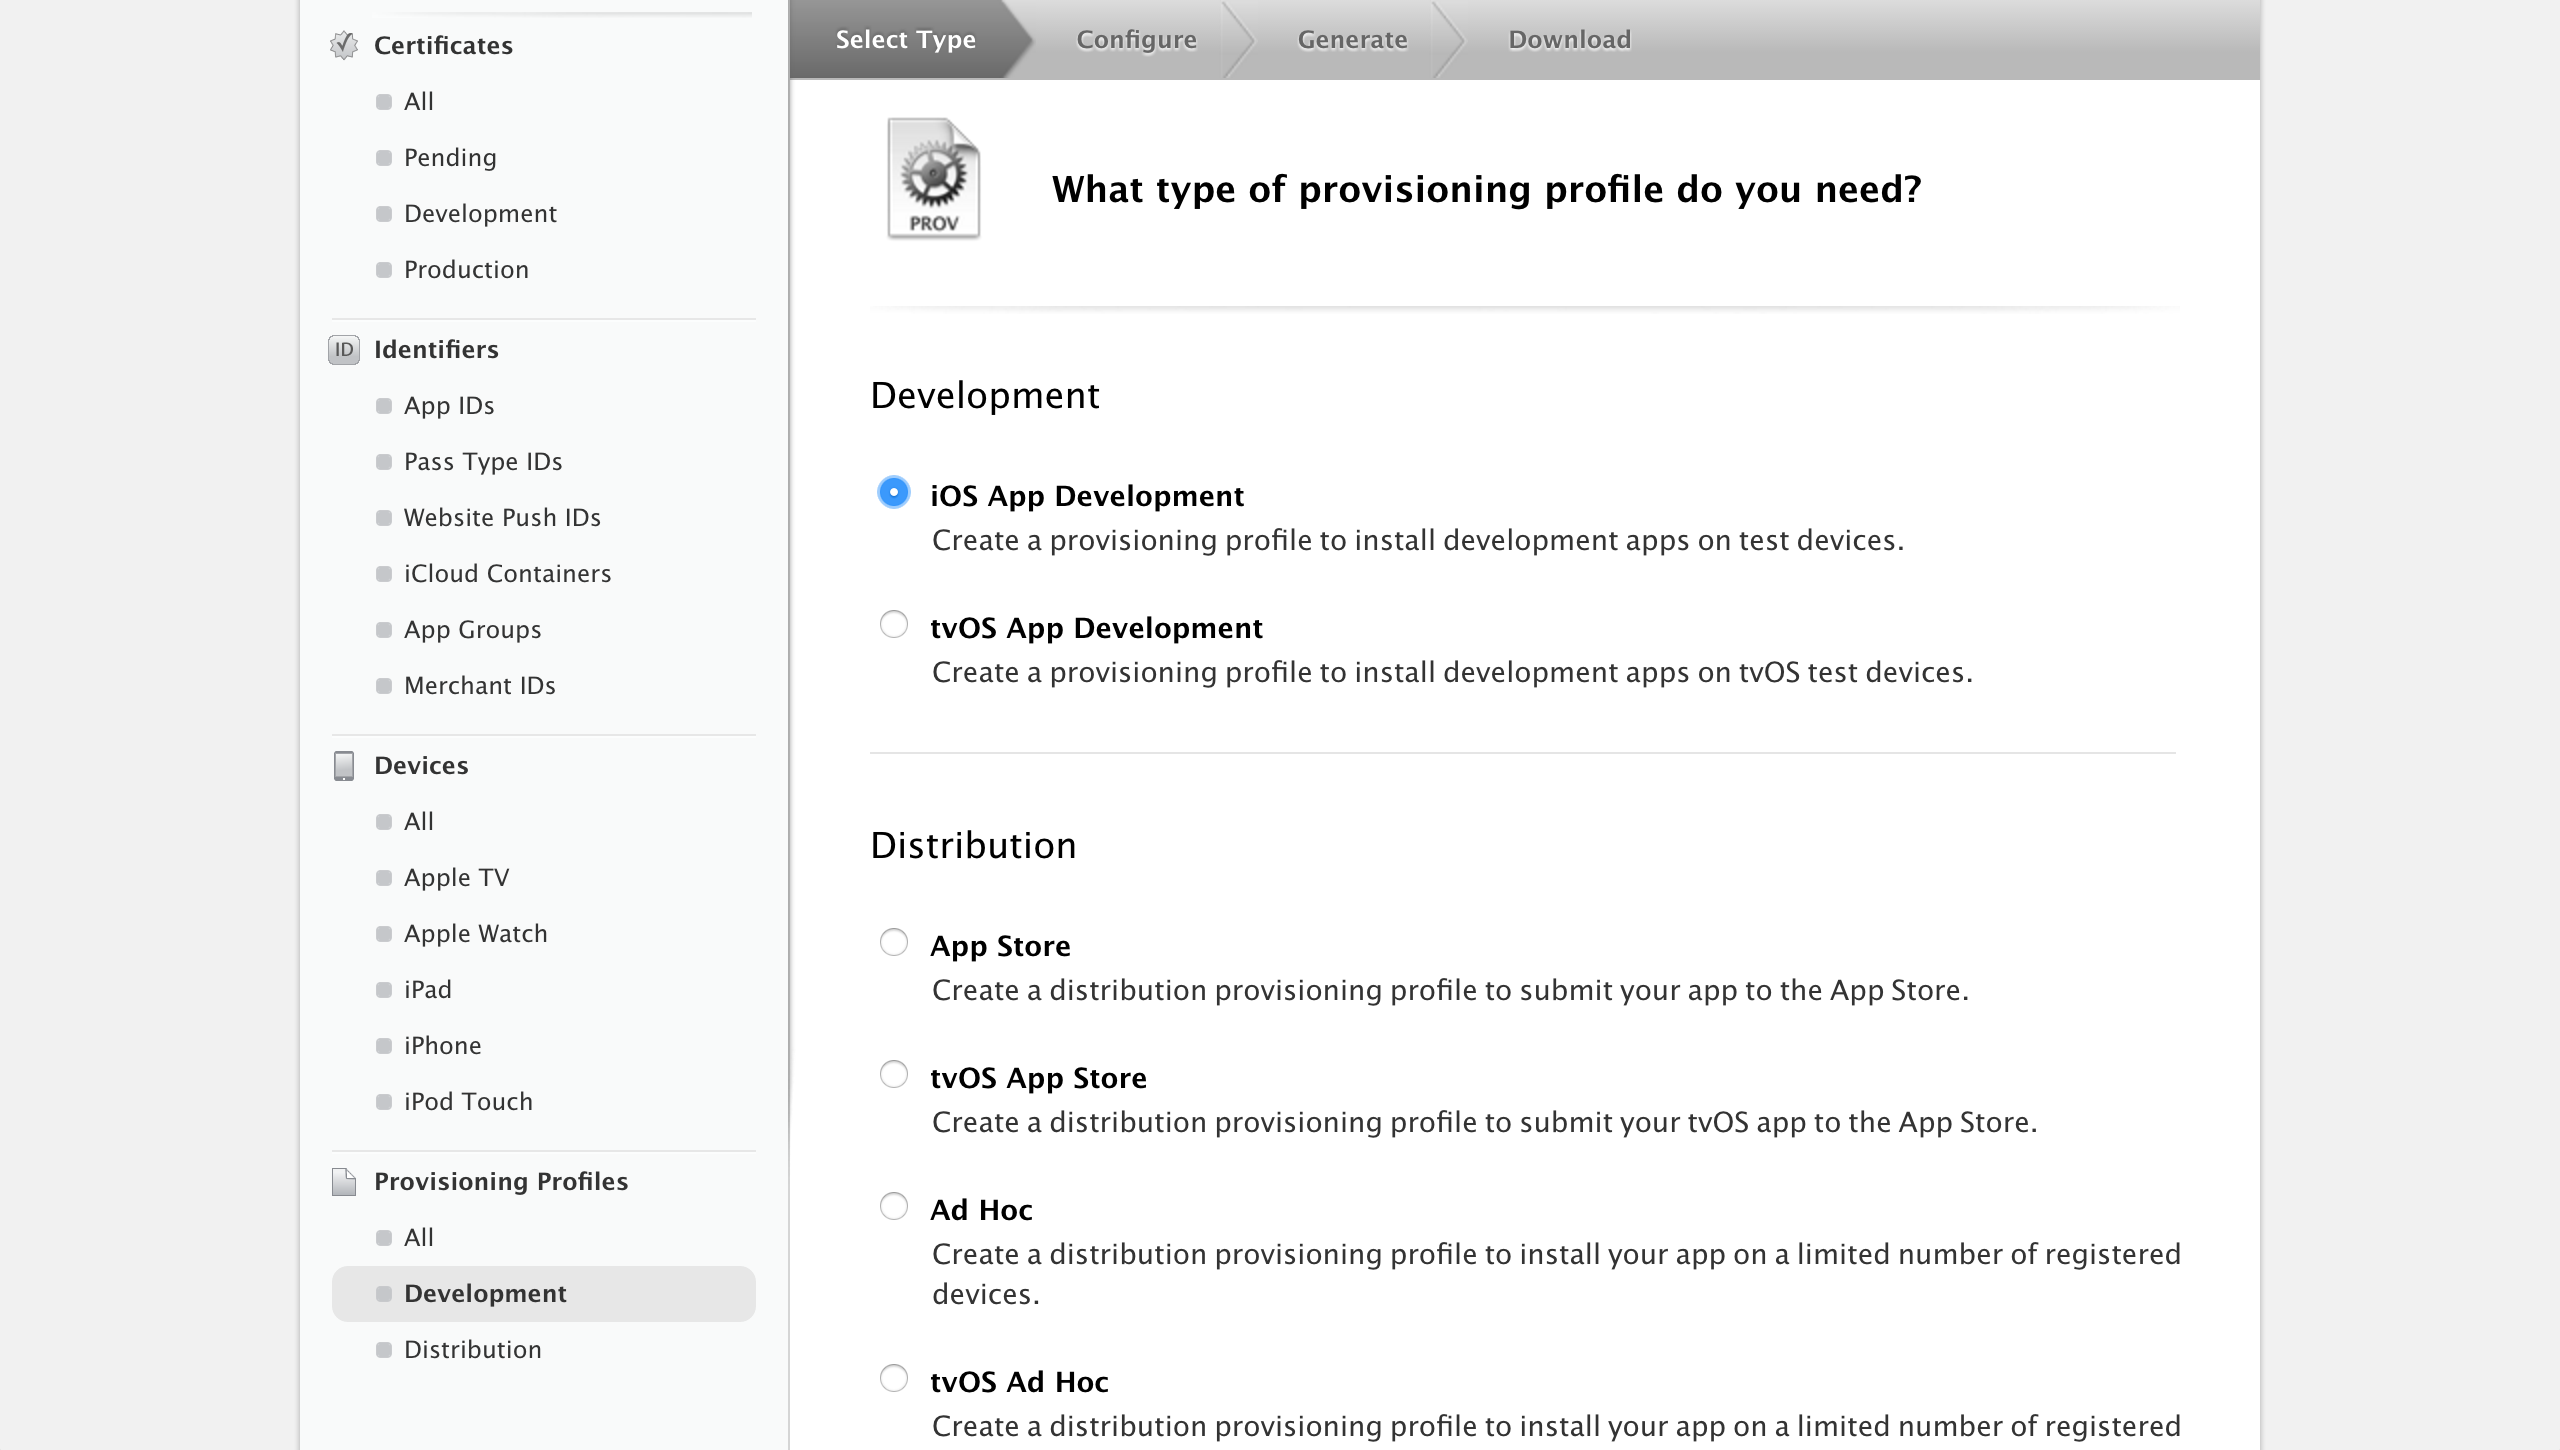
- Under Development, select iOS App Development.
- Select the correct App ID (with the Bundle ID matching your app’s
config.xmlfile) - Select the certificate you generated.
- Select any and all development devices.
- Download the
.mobileprovisionfile, which is your provisioning profile file.