Working with Git
Ionic Pro integrates with Git version control software in order to manage the versions of your app that you share through Ionic View, updates released with Live Deploy, and iOS & Android binaries built on Ionic Pro. If you’re familiar with how Heroku works, then you’ll find Ionic Pro’s git workflow similar to use.
Installing Git
If you are on Mac or Linux, git should already be installed and configured properly.
For Windows, download and install Git for Windows. During installation, make sure to select “Use OpenSSH.”
If you’re using the GitHub integration you can also use GitHub’s Desktop Client to commit and push versions of your app.
Sharing your code with Ionic Pro
Ionic Pro to needs access to your source code to build native binaries, release live deploys & bug fixes, and share your app on Ionic View. Using Git allows you to specify the exact versions of your app which you would like to operate on. There are two ways in which you can give Ionic Pro access you your source code and Git versioning history.
GitHub Integration
If you are already using GitHub you can link your GitHub account with your Ionic Pro account.
In order to link your Ionic Pro app with GitHub you will need an existing GitHub repository.
Once your account is linked and the GitHub repository exists you can link it to your Ionic app in the Git section of the app settings tab in your app on the Ionic Pro dashboard
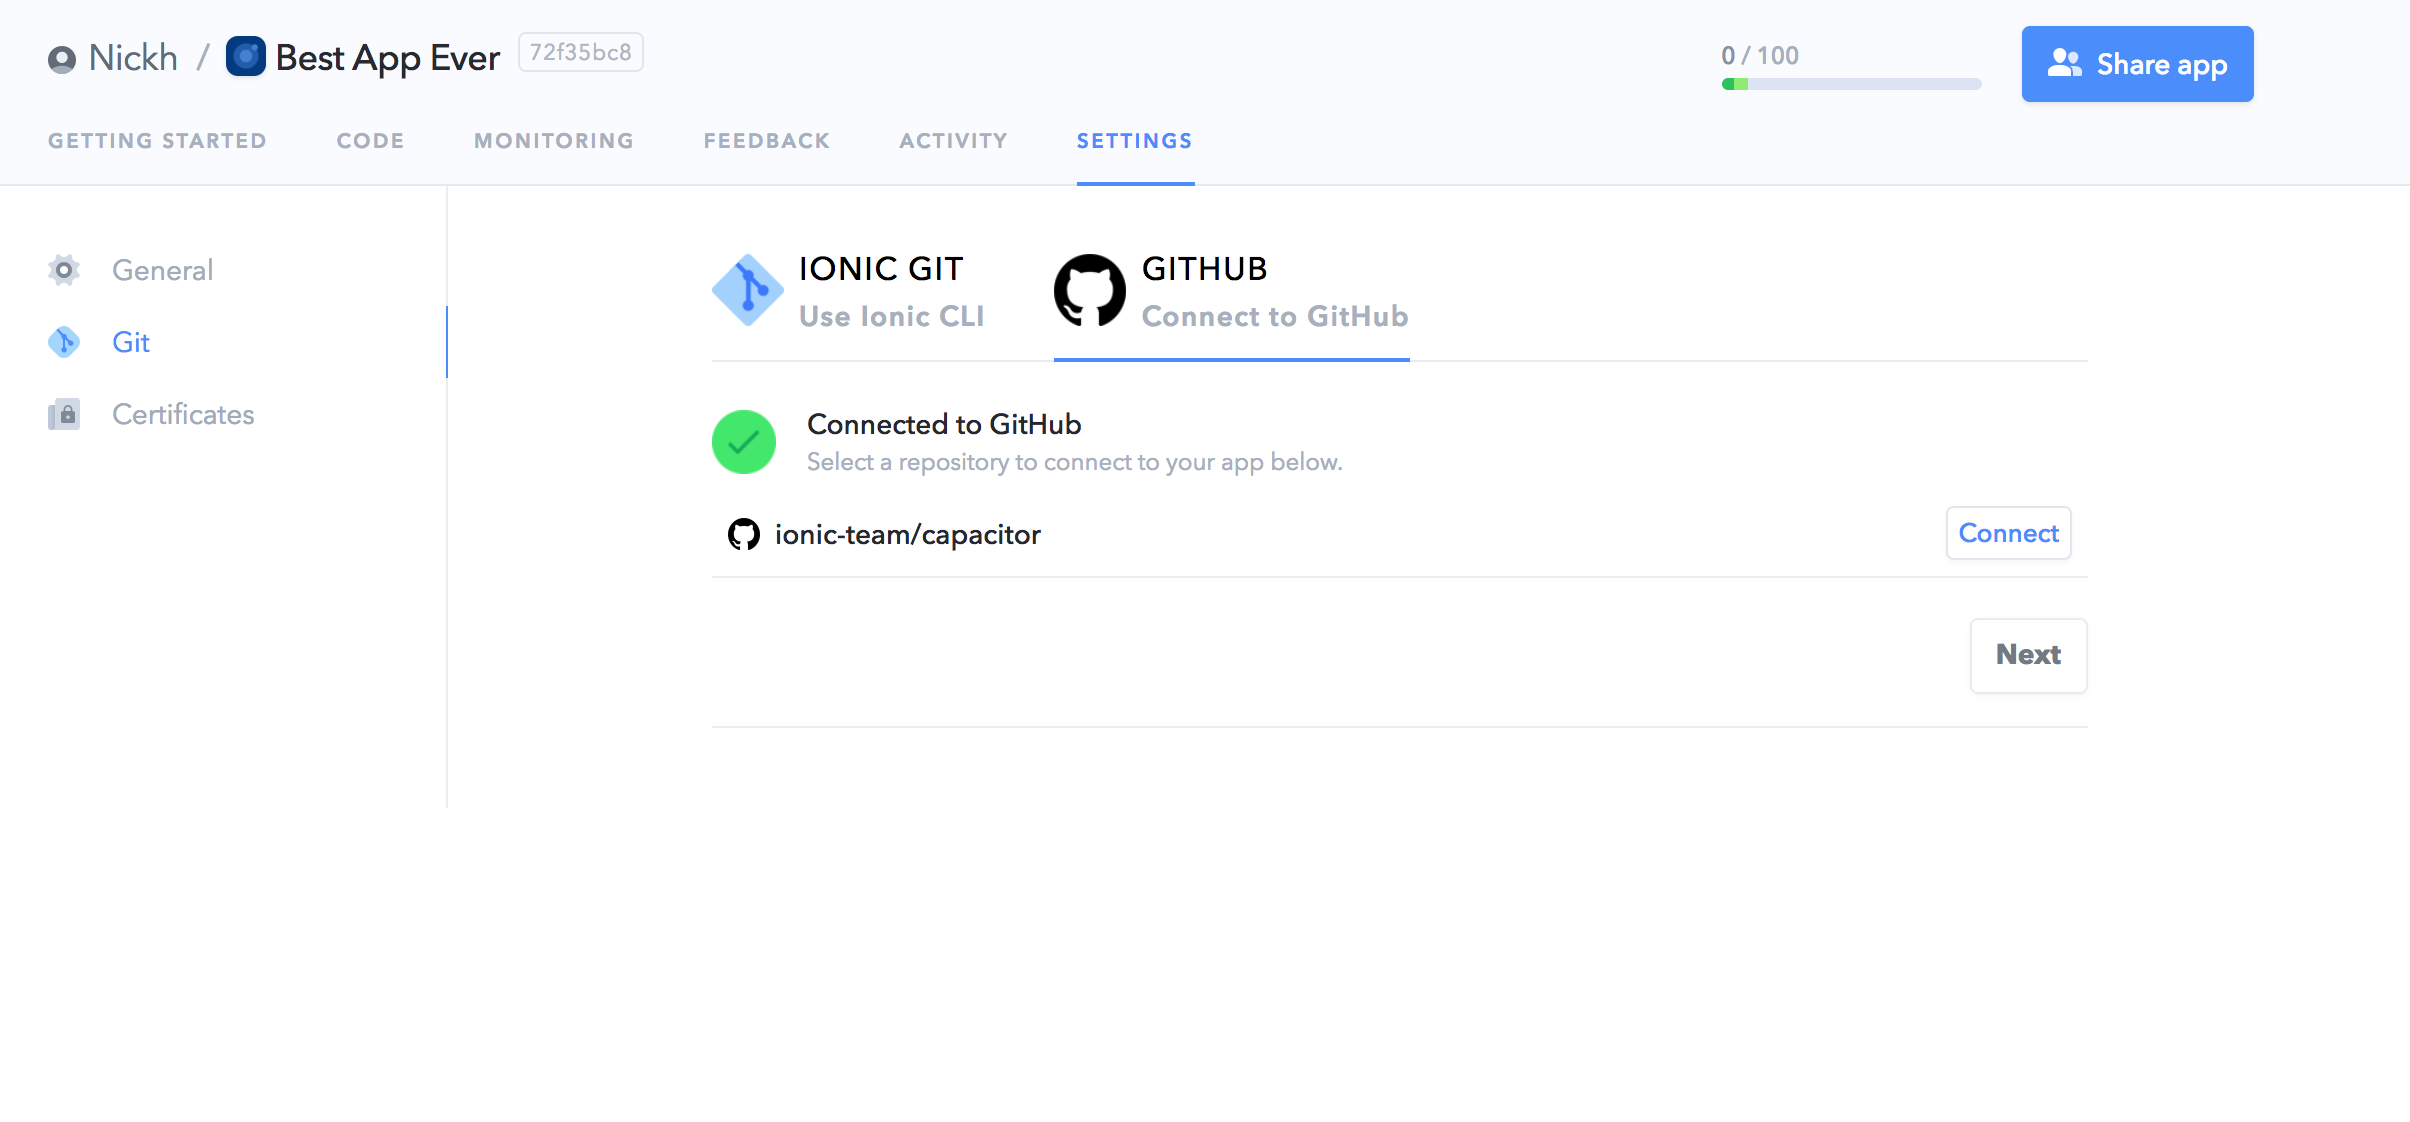
or in the terminal by running ionic link in the root directory of you Ionic app (you can also link to GitHub during ionic start).
When you link the GitHub repository a webhook will be created on GitHub
and events will be sent to Ionic Pro so that we can automatically trigger builds for any of the branches you specify during the linking process.
If you’re not familiar with branches or the GitHub flow you might want read about them here.
Be sure to specify all the branches you would like to trigger builds for. By default only the master branch will trigger builds.
Using Ionic as a git remote
If you are not using GitHub you can push your source code directly to Ionic Pro using Git.
Simply choose Ionic as your git remote during ionic start or run ionic link in the root directory of your existing app
in order to create the ionic git remote. You can learn about git remotes here.
Ionic Pro is not a replacement for your source code repository service
It is recommended that you use a git hosting service to manage your primary app source code (GitHub, Bitbucket, GitLab, etc.)!The
ionic remote is used only for interacting with the Ionic Pro suite of services.
Follow the steps at Getting Started to start a new App or link an existing App to Ionic Pro.
Once you’ve created and linked your app to the Ionic remote you can learn about:
Pushing New Builds
Once you have changes locally that you’d like to build and manage on Ionic Pro, first commit your code changes, and then push to the ionic remote:
git add .
git commit -m "Million dollar commit"
git push ionic master
Don’t forget to also periodically push to your origin git hosting service
as Ionic Pro is not a replacement for GitHub, GitLab, or a self-hosted git repository.
Working with Branches
Throughout our documentation and tutorials you’ll see referencess to git push ionic master.
Because we specified master this will always push your master branch up to us.
However, working with other branches is easy!
Here’s an example of how you’d push code to a branch.
git checkout -b my-new-branch
<make a change>
git add -p
git commit -m 'in our new branch'
git push ionic my-new-branch
It’s also common to set up automatic deployments (for Deploy and Ionic View to use) to channels using specific branches. For more information on that, please check out our Ionic Deploy documentation.
Working with other Team Members
Git makes it easy to collaborate with other team members using it’s built in features. We highly recommend you use a separate git service (such as GitLab, GitHub, etc) in order to accomplish collaborating.
When adding a new member to your project, they should clone the repository from your external git hosting service, then use ionic link on the project like so:
git clone YOUR_PROJECT_URL/your-project.git
cd your-project
ionic link
The ionic link command will prompt you to choose an existing project that the member has access to (through your Organization & Teams)
and walk them through the required setup. After they are linked, they can use git push ionic master and other related commands like normal.
Adding SSH Keys
The Ionic CLI automatically detects and adds your public key (or creates new ones) to your Ionic Pro account as part of the link and start commands when
you choose Ionic for your git remote. If you have additional public keys you’d like to link to Ionic Pro, create them manually using ssh-keygen,
log into your Ionic Pro account, and add the keys manually under “SSH Keys”
Using a Git Hosting Service
If you used ionic start to begin your project, we’ve already ran git init for you.
We recommend that you host your code on a service like GitHub, Bitbucket, GitLab, etc.
You can find information on setting up & pushing to each of the above services on their page:
Once you’ve added your remote origin, you can use plain ‘ol git push to send commits to your repository on the hosting service of your choice.