Editor tools and shortcuts

Labelled 2D Animation Skinning Editor tools
The Skinning Editor tools are split-up into the following groups:
B. Pose tools
C. Bone tools
E. Weight tools
F. Rig tools
Editor toolbar
This toolbar lets you toggle between Character and Sprite Sheet modes. It also contains the Visibility toggle.
| Tool | Default Shortcut | Function |
|---|---|---|
Toggle View Mode |
Shift + 2 | Switch between the Character and Sprite Sheet view modes. |
Visibility |
Shift + P | Toggles the Sprite visibility panel, which controls the visibility of the Sprite meshes and bones in the editor window. |
| Toggle Tool Text | Shift + ` | Show or hide text on tool buttons. |
Pose tools
This is a toolbar that contains the options to Preview Pose and restore the default pose with Restore Pose.
| Tool | Default Shortcut | Function |
|---|---|---|
Preview Pose |
Shift + Q | Enable this mode when moving and rotating an actor's model and joints to preview its poses after rigging. Any changes made in this mode are not saved. |
Reset Pose |
Shift + 1 | Restores an actor's bones and joints to their original positions. |
Set Pivot |
Shift + T | Enable this tool to edit the pivot point of the actor with the Pivot Panel options. |
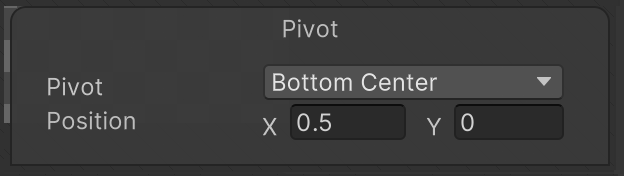
Pivot Panel
The Pivot Panel appears when you enable the Set Pivot tool.
| Property | Function |
|---|---|
| Pivot | Select the desired location of the Pivot from the dropdown menu. |
| Position | Enter a value from 0 to 1 to adjust the X and Y position of the pivot. This is a normalized value from 0 to 1, where (0,0) is lower left of workspace and (1,1) is the upper right of the workspace. |
Bone tools
Use the Bone Tools to create and edit the bones of your character and their hierarchy.
| Tool | Default Shortcut | Function |
|---|---|---|
Edit Bone |
Shift + W | Reposition the bones into a new position. These changes are automatically saved as the default bind pose for the Restore Bind Pose tool. Sprite geometry does not deform with the bones in this mode, even if the bones are attached as influencers. |
Create Bone |
Shift + E | Click and drag to create bones. |
Split Bone |
Shift + R | Splits the selected bone. |
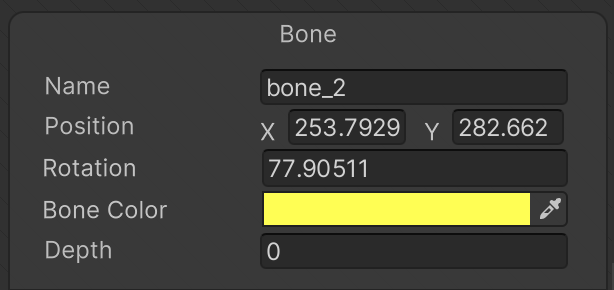
Bone panel
The Bone panel appears at the lower right of the editor window when you select a bone with one of the Bone Tools active.
| Property | Function |
|---|---|
| Name | Displays the name of the selected bone. Enter a new name here to rename the selected bone. |
| Position | The world position of the bone. |
| Rotation | The world rotation value of the bone. |
| Bone Color | The color of the bone. |
| Depth | Displays the Z-value of the selected bone that determines the render order of the vertices under its influence (refer to the examples below). Enter a new value (which can be negative) to change the render order of the affected vertices. Refer to the bone tab and hierarchy tree documentation for more information on how the Depth value affects the way the Sprite mesh is rendered and deformed. |
Setting the Depth value
The following examples show how the Depth value of a selected bone affects the render order of the mesh vertices it influences. In this example, the selected bone (orange) and has an intitial Depth value of 1.
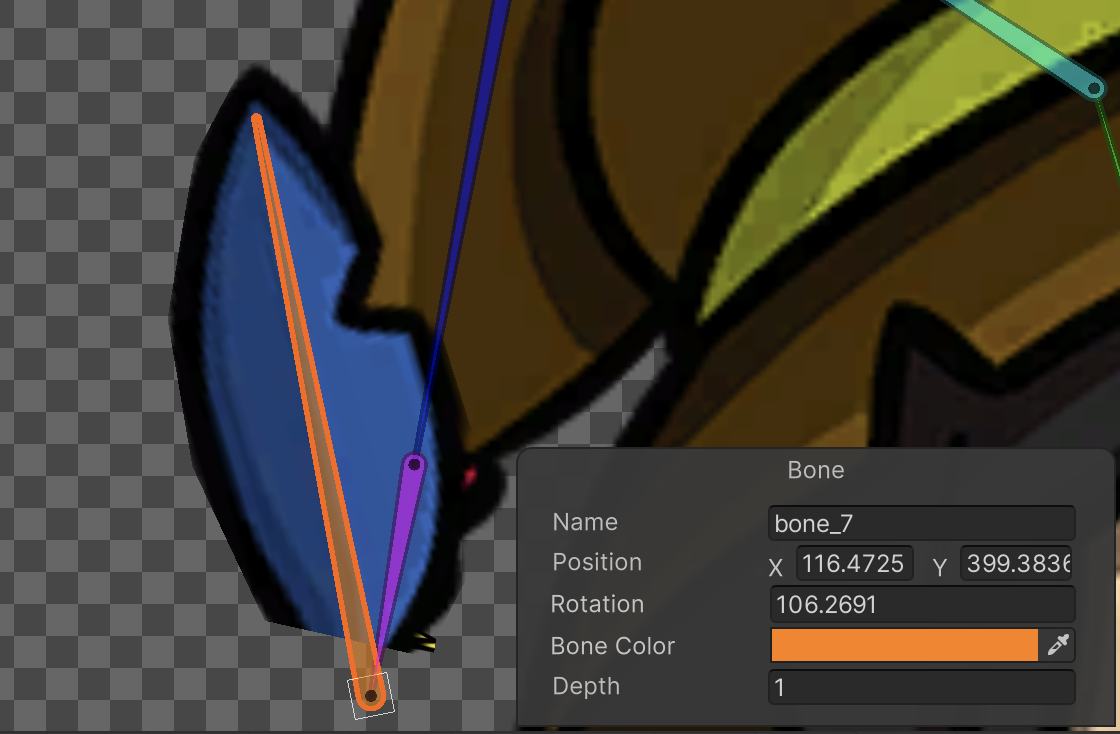 Example 1: With the Depth value of 1, the vertices that are influenced by it (the blue are of the Sprite and mesh) appear in front of the other vertices, which have a lower Depth value.
However, by setting the bone's Depth to -1 instead,
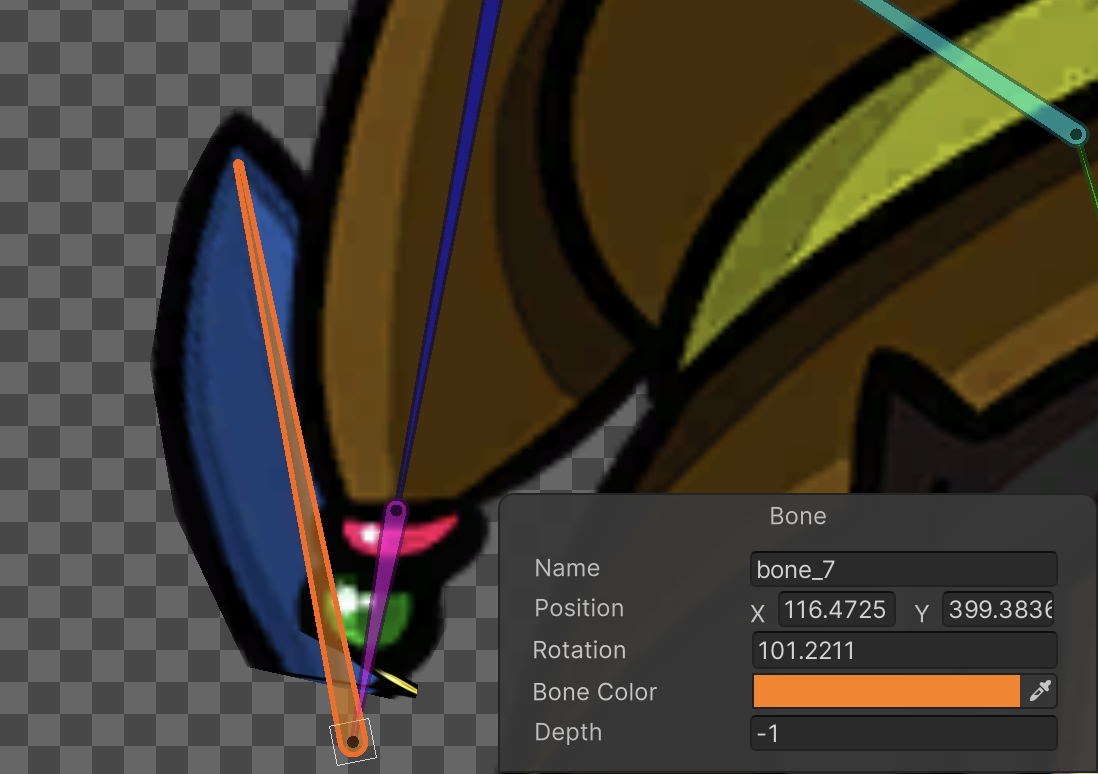 When the selected bone’s Depth is set to -1 instead, the vertices that are influenced by it appears behind of the other vertices.
Geometry tools
Use the Geometry tools to generate and edit the meshes of the different Sprites that make up your character.
| Tool | Default Shortcut | Function |
|---|---|---|
Auto Geometry |
Shift + A | Select to auto-generate meshes for Sprites. When this tool is selected, the Geometry panel becomes available at the lower right of the Skinning Editor. |
Edit Geometry |
Shift + S | Edit generated meshes by repositioning vertices. |
Create Vertex |
Shift + D | Create new vertices to create geometry. |
Create Edge |
Shift + G | Create new edges to create geometry. |
Split Edge |
Shift + H | Split an existing edge into two. |
Geometry panel
The Geometry panel is only visible when Auto Geometry is enabled. It contains the available settings that affect how the geometry of selected Sprites are generated.
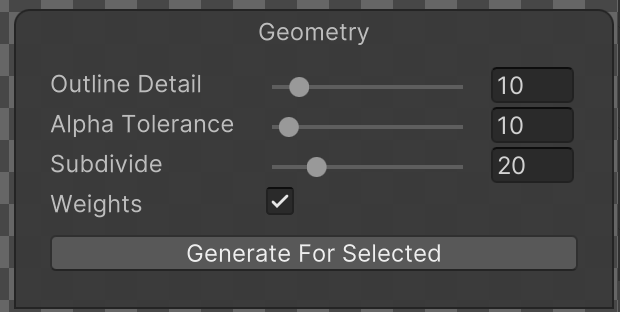
Visible only when Auto Geometry is enabled.
| Property | Function |
|---|---|
| Outline Detail | Use the slider to adjust the accuracy of the generated geometry’s outline to the outline of the Sprite. Smaller values create simpler outlines, while larger values create denser outlines that fit to the Sprite’s outline more accurately. |
| Alpha Tolerance | Use the slider to set the alpha value threshold to consider when generating geometry. Pixels with an alpha value lower than the set tolerance value are considered transparent during outline detection when the geometry is generated. |
| Subdivide | Use the slider to adjust the tessellation of the Sprite mesh by adding or decreasing the number of vertices inside the generated mesh. |
| Weights | Enable to automatically assign weights between the generated geometry mesh and nearby bones. |
| Generate For Selected/Generate For All Visible | Select this button to generate a geometry mesh for selected Sprites based on the property settings above. To generate geometry for all Sprites in the Skinning Editor, do not have any Sprite selected when you select this button. |
Weight tools
Vertices in the generated geometry meshes are influenced by different bones which affect how the meshes deform during animation. The percentage of influences from different bones for each vertex is contained in the weight information assigned to that vertex, which you can control with the following Weight tools.
To add weights to your Sprites, you can first ensure that there are bones overlaying the Sprites and geometry has been generated.
| Tool | Default Shortcut | Function |
|---|---|---|
Auto Weights |
Shift + Z | Auto-generate weights between the geometry and bones. When this tool is selected, the Weights panel becomes available at the lower right of the Skinning Editor that displays the available settings and the option to generate weights for. |
Weight Slider |
Shift + X | Use the slider to adjust weights. |
Weight Brush |
Shift + N | Adjust weights by painting with a brush. |
Bone Influence |
Shift + V | Select which bones influence a Sprite. |
Sprite Influence |
Shift + M | Select which Sprites are being influenced by a bone. |
Weights panel
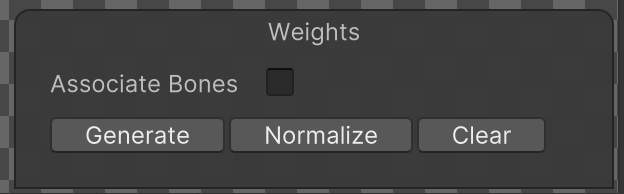
The Weights panel appears at the lower right of the Sprite Editor window when Auto Weights under the Weight tools is selected.
| Property | Function |
|---|---|
| Associate Bones | Select this box to automatically associate bones to the Sprite geometry they overlay. |
| Generate/Generate All | Select this button to generate weights for the currently selected Sprite, or for all Sprites if no Sprite is selected. This does not do anything if geometry has not been generated for the Sprites, or if no bones are associated with the Sprite geometry. |
| Normalize | Normalizes the weights of the selected Sprite, or all Sprites if no specific Sprite is selected. |
| Clear | Clear the weights of the selected Sprite, or of all Sprites if no specific Sprite is selected. |
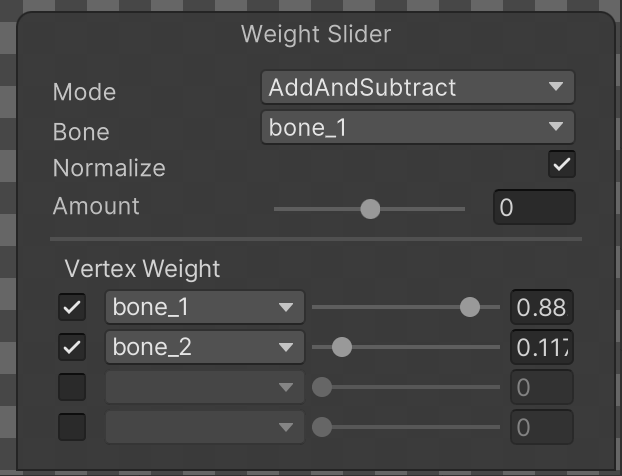
Weight Slider
| Property | Function |
|---|---|
| Mode | The current behavior of the Weight Slider tool. |
| Add and Subtract | Select this mode to have all sliders influence all vertices around the selected bone (currently displayed in the Bone property). |
| Grow and Shrink | Select this mode to have all sliders influence only vertices that are already affected by the selected bone (which is selected in the Bone property). |
| Smooth | Averages the weights of all vertices with their neighbors to create an even distribution of weight across all vertices. |
| Bone (unavailable if Mode > Smooth) | Displays the currently selected bone. Use the drop-down menu to select a different bone, or select another bone. |
| Normalize | Select this to ensure the total normalized weight of all vertices of a selected Sprite mesh is equal to one. |
| Amount | Amount of weight applied on selected vertices. |
| Vertex Weight | Adjust the bone weights of selected vertices. |
Weight Brush

| Property | Function |
|---|---|
| Mode | The current behavior mode of the weights tool. |
| Add and Subtract | Select this mode to have all sliders influence all vertices around the selected bone. |
| Grow and Shrink | Select this mode to have all sliders influence only vertices that are already affected by the selected bone. |
| Smooth | Averages the weights of vertices with their neighbors to create a smoother distribution of weights. |
| Bone | The bone that the Brush is painting influence for. Select a different bone via the drop-down menu. |
| Normalize | Enable to ensure the normalized weight of painted vertices will equal to 1. |
| Size | Size of the weight brush cursor. |
| Hardness | Amount of weight applied by the brush per brushstroke. Higher values increase the weight per brushstroke, up to the maximum of 100 where the full weight is applied at once. |
| Step | Number of increments needed to apply the full weight of brush. |
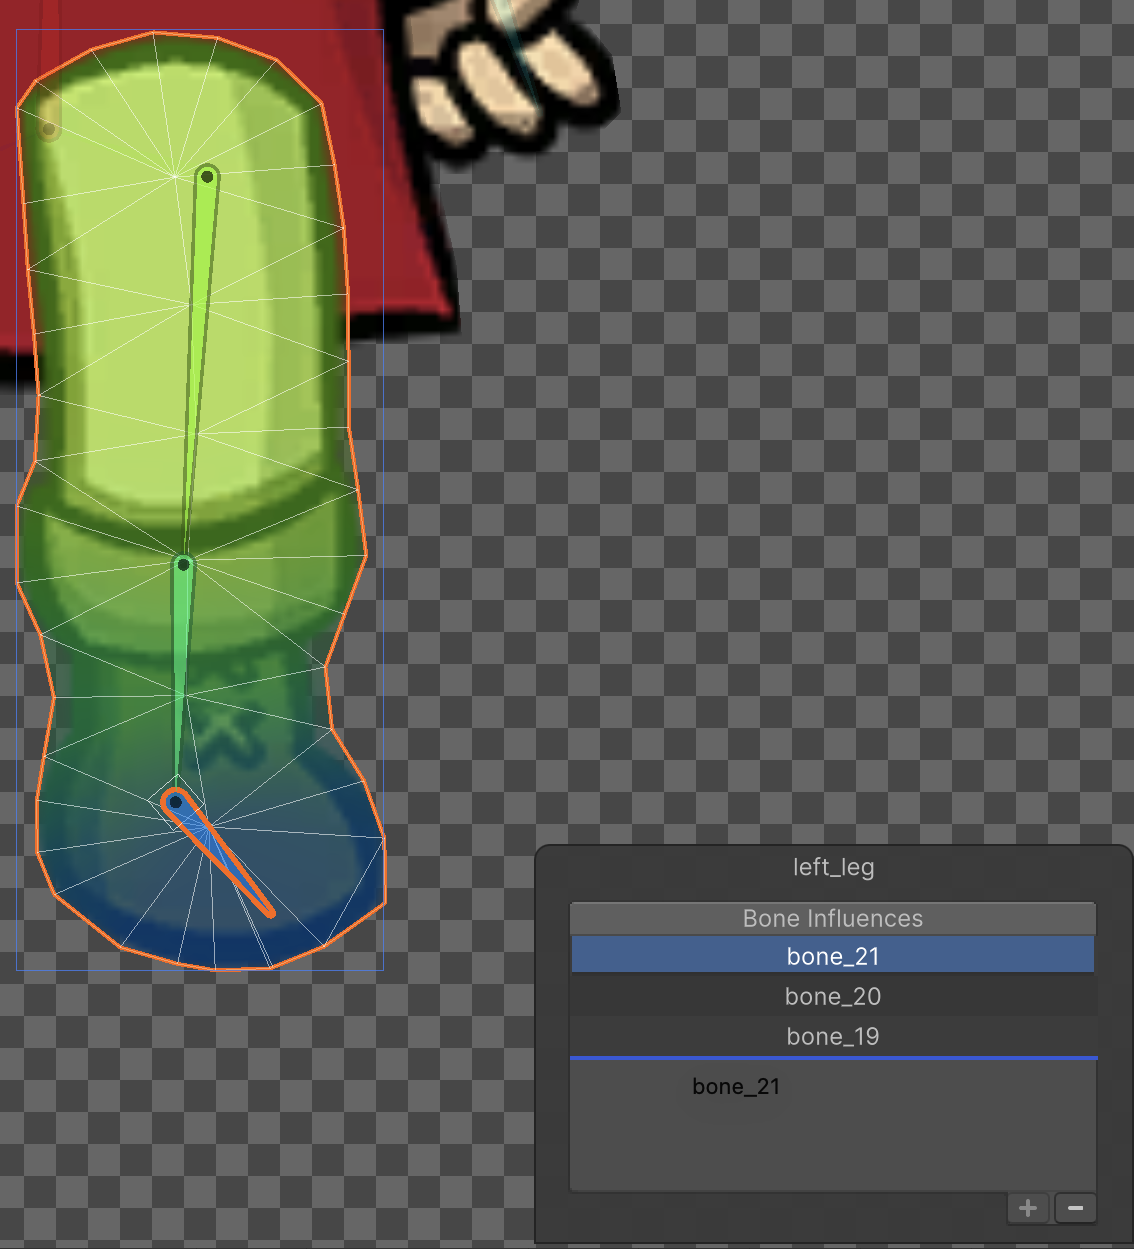
Bone Influences panel
The Bone Influences panel displays a list of bones that are currently influencing the selected Sprite mesh.

When the Skinning Editor is set to Character mode, the Bone Influences panel allows you to add a bone to the list which includes its influence in the deformation of the selected Sprite’s mesh, or remove a bone from the list which removes its influence instead.
To add a bone to the list, select the bone in the Skinning Editor window and then select Add (+) at the lower right of the panel. To remove a bone from the list, select the bone in the list or in the editor window and then select Remove (-).
Rearranging bone order
You can rearrange the bone order in the Bone Influences panel by selecting and the dragging the respective bone entries up or down the list.
The order of the bones in the Bone Influences panel determines the order of the bones on the Sprite Skin component. This is especially important when replacing the Sprite for deformation in the Sprite Renderer, such as when using Sprite Swap, as you can ensure the bone order remains the same between the Sprites and that the correct Transform drives the correct deformation.
![]()
Sprite Influences panel
The Sprite Influences panel displays a list of Sprite meshes that are currently being influenced by the selected bone.
![]()
When the Skinning Editor is set to Character mode, the Sprite Influences panel allows you to remove an unwanted Sprite mesh from the list so that it’s not influenced by the selected bone. It’s also possible to add a selected Sprite to the list which will include the selected bone’s influence in its deformation.
To add a Sprite mesh to the list, select the bone in the Skinning Editor window as well as the Sprite you want to add, and then select Add (+) at the lower right of the panel. To remove a Sprite from the list, select it in the list or in the editor window and then select Remove (-).
Rig tools
The Rig tools contain the option to Copy and Paste bones from and into a skeleton rig.
| Tool | Default Shortcut | Function |
|---|---|---|
Copy |
Ctrl + C | Copies the bone and mesh data from the current selection. |
Paste |
Ctrl + V | Pastes the copied bone and mesh data to the current selection. |
Paste |
Shift + B | Use this shortcut to show additional pasting options. |
Copy and Paste behavior
Once you have rigged the skeleton and bone weights of your actor, you can reuse the same rigged skeleton with other Model Prefabs by using the Copy and Paste options on the Rig tools. This is useful if you need to quickly create characters that share the same build and animations.
You can only Copy and Paste if the source and destination Model Prefabs have the same number of Sprites and Sprite names. When you Copy and Paste the bone and mesh data, the following occurs:
- Copied bone data is pasted to the destination.
- Mesh, weights, and bone association of source Sprite(s) are pasted to destination Sprite(s) with the same names.
Copy behavior
To copy sprite data, select a sprite and then select Copy. This copies the mesh and bone data associated with that sprite. If no sprite is selected, then this copies the data of all sprites' currently in the Skinning Editor window instead.
Paste behavior
To paste copied sprite data, select the Paste button. This opens the Paste panel at the lower right of the editor window which contains the following data options. Select which data you want to paste from the copied sprite data.
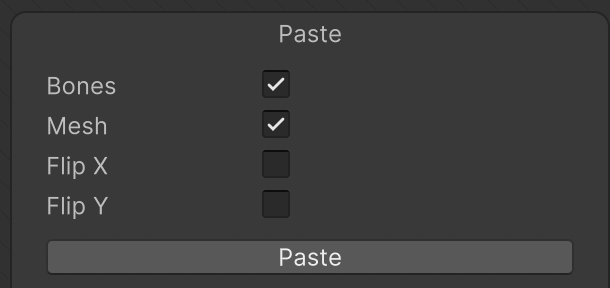
Paste dialog box.
| Option | Function |
|---|---|
| Bones | Paste bone data. |
| Mesh | Paste mesh data. |
| Flip X | Paste the data but mirrored along the X-axis. |
| Flip Y | Paste the data but mirrored along the Y-axis. |
To paste copied sprite data, select a sprite and then select Paste. This pastes the selected data to a selected sprite. If no sprite is selected, then this pastes the data to all sprites’ currently in the Skinning Editor window with the same name as the copied sprite.