About projects
Projects contains resources such as ColdFusion components, interfaces, and HTML and CFML pages that are used to develop ColdFusion applications.
Each project is stored in a default workspace. The workspace stores your projects and other metadata. The preferred workspace location is the ColdFusion document root
You can associate a project with a ColdFusion server. By doing so, you can test the project before final deployment.
Note: To preview files in your project using a web browser, ensure that you have set your project location to the ColdFusion document root. |
To do any CFML development in ColdFusion Builder, you first create a ColdFusion project. To know more about creating a project in ColdFusion Builder, see Creating a ColdFusion project.
Creating a ColdFusion project
The Project Builder wizard guides you through the steps of creating a ColdFusion project.
Enter project information
- Right-click in the Navigator area and click New > ColdFusion Project.
- In the Project Builder wizard, specify the project name.
- To change the default project location, deselect Use Default Location.
- Click Next to specify the ColdFusion server details.
Enter server details
Select a server from the Server pop-up menu. If you have not configured a ColdFusion server, then click Add Server to add a server. For more information about setting up a ColdFusion Server, see Adding ColdFusion servers.
Note: If the project is in the server web root, then the Sample URL box is automatically populated with the server URL. For example, http://127.0.0.1:8500/eval, where 127.0.0.1 is the server host, 8500 is the port number, and eval is the project name.
- Specify your preview settings to use an external web browser by selecting a web browser installed on your computer. The internal browsers are selected, by default.
- Click Next.
Add existing sources
- In this step, you can:
- Link existing resources folder to the project.
- Select previously configured applications with the current project.
- Click Add to select the folder to link to the project.
- Click Finish to build a new ColdFusion project.
For more information about linking resources, see Link to resources outside the workspace.
Configure properties for projects and servers
You can use the Properties dialog box in ColdFusion Builder to configure project properties and server settings.
To open this dialog box, right-click the project in the Navigator view and select Properties.
Configure project properties
- Select ColdFusion Project from the left pane of the Properties dialog box. You can add and remove external projects as links here.
Configure variable mappings
You use variable mappings to provide Code Assist for component variables that are not defined in the file being edited or in the included files.
- In the Properties dialog box, you see a tree-view structure on the left. Select ColdFusion Variable Mappings.
- Click New.
- In the Variable Name field, specify the name of the variable to map, for example, application.cfc1
- In the Mapped To field, enter the fully qualified name of the project variable, for example, com.adobe.mycfcs.cfc1
Configure server settings
- To open the ColdFusion Server Settings page, select ColdFusion Server Settings in the left pane of the Properties dialog box.
- To create a ColdFusion Server instance, use the Servers pop-up menu.If you have already configured a server instance, you can assign it to your ColdFusion project. For more information about creating a server instance, see Adding ColdFusion servers.
Add ColdFusion pages, interfaces, and components
ColdFusion Builder provides wizards that guide you through the creation of ColdFusion pages, interfaces, and components.
Create a ColdFusion page
- Right-click the ColdFusion project in the Navigator.
- Click New > ColdFusion Page.
- In the New ColdFusion Page wizard, specify a name for the ColdFusion (CFM) page.
- Click Finish.
Create a ColdFusion component
- Right-click the ColdFusion project in the Navigator.
- Click New > ColdFusion Component.
- In the New ColdFusion Component wizard, specify the following:
- Component name
- Hint to identify the component (optional).
- Any component that you want to extend.
- Any interface that you want to implement.
- Select the output type to be true or false.
- Click Next.
- Click Add to specify the component property details, such as the property name, display name, hint, and default value.
- Enter or select a property type from the Type drop-down list.
- (optional) Select Add Getter and select its access type from the Access drop-down list.
- (optional) Select Add Setter and select its access type from the Access drop-down list.
- Click OK to return to the New ColdFusion Component wizard.
- To add functions to the ColdFusion component, click Add Function.
- In the New Function wizard, specify the functions details, such as the function name, display name, hint, access type, return type, roles, and output type.
- Click OK.
- To add arguments to the selected function, click Add Argument.
In the New Function Argument dialog box, specify the argument name, display name, hint, argument type, and the default value of the argument.
Note: The options for the argument type are the same as the argument type options for ColdFusion Interface.
- Click OK.
Click Finish to create a ColdFusion component (CFC file).
Note: You can use Outline View to navigate through the functions and tags that you add to your ColdFusion page or ColdFusion component.
Create a ColdFusion interface
- Right-click the ColdFusion project in the Navigator.
- Click New > ColdFusion Interface.
- In the New ColdFusion Interface wizard, specify the interface name, hint, and display name.
- To extend another interface, browse or specify the name of the CFC.
- Click Add Functions to add a function and specify its details, such as the function name, function hint, return type, roles, and output (true or false).
- Click Add Arguments to specify the arguments for the selected function. Enter or select an argument type from the Type drop-down list.
- Click Finish to create a ColdFusion interface.
Add other files
You can also add the following types of files to your ColdFusion project:
- .html
- .js
- .css
- .lxr (lexer file)
- .col (colorization file)
- .sdoc (ScriptDoc file)
- Untitled versions of the preceding files
In addition, you can create generic text files, folders, and projects. You add these files to a project much as you add ColdFusion pages or components. To add any of these files to a project, do the following:
- Right-click the project.
- Select New > Other.
- Expand Project Files to specify a filename or expand Untitled Files to create an untitled file.
- Select the file that you want to create.
- If you are creating an untitled file, click Finish.
- If you selected Project Files, click Next and specify the filename. Then click Finish.
Create CFM/CFC files outside the workspace
You can create CFM/CFC files outside the workspace using the File view.
- In the File view, right-click the local folder in which you want to create the CFM/CFC file.
- Select New > ColdFusion Page/ColdFusion Component/ColdFusion Interface and then specify the details.
Set Launch Page
You can designate a specific file as the Launch Page for your project. This page is loaded when you run/debug a file in the project.
- In the Navigator view, select the page to set as Start Page.
- Right-click the page and then select Set As Start Page.
To disable a page from being the Launch Page,
- In the Project View, right-click the project and then select Properties > ColdFusion Project.
- In the Start Page Setting, deselect Use Start Page.
Dynamically generate Start Page URL for framework applications using extensions
See Extension support for setting Launch Page----
Set URL Prefix
- In the Navigator view, select the project or folder for which you want to specify a URL prefix.
- Right-click the selected project or folder and select Set URL Prefix.
- Enter the URL for the selected resource.
Import, export, and delete projects
Import projects
You can import both ColdFusion and non-ColdFusion projects into ColdFusion Builder.
- Right-click in the Navigator view and select Import.
- In the Import wizard, select ColdFusion > Import Existing Projects.
- In the Import ColdFusion Project dialog box, browse and select the project location. A list of all projects is displayed.
- Click Refresh to search and refresh the project list.
- Select Show All Projects to display all non-ColdFusion and non-ColdFusion Builder projects in the same location.
- Select Add ColdFusion Nature To Non-ColdFusion Projects to apply ColdFusion Builder functionality, such as preview, editing, and debugging, to non-ColdFusion Builder projects.
Select the appropriate projects and click Finish.
Note: Importing a project retains the project properties including the server details, launching settings, browser details, application details, and linked folders.
Export projects
You can export files and folders from a ColdFusion Builder or non-ColdFusion Builder project to a designated location. However, for ColdFusion Builder projects, ColdFusion Builder functionality like server settings, preferences, and such are not exported.
- Right-click in the Navigator view and select Export.
- In the Export wizard, select ColdFusion > Export.
- In the Export Project dialog box, browse and select the location where you want to export the project.
- Click Select All to export all files and folders within the project, or click Filter Types to specify the files that you want to export.
- Click Finish to export your project to the designated location.
Delete projects
When you delete a project, you remove the project from the current workspace. You can also remove the project from your computer’s file system at the same time.
- Right-click in the Navigator view and select Delete.
- To remove the project from the workspace and the file system, select Delete Project Contents On Disk. The project is then permanently removed from the file system; you cannot undo the command.
 icon.
icon.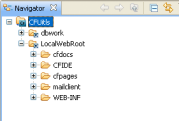
 in the workbench toolbar.