WordPress has always been incredibly flexible and customizable. The Block and Site Editors are expanding our abilities to create custom experiences, and the ability to create custom blocks only enhances that ability.
Currently, the create-block utility only allows for creating one block at a time and doesn’t give the option for a multi-block setup. For example, what if you want to create two or more related blocks, especially where one custom block would use another to curate a user’s experience? What if you aim to use post meta to provide extra context to a user? These are common use cases and the area in which WordPress has always excelled.
Below, you’ll learn how to structure a multi-block approach using the create-block utility.
Table of Contents
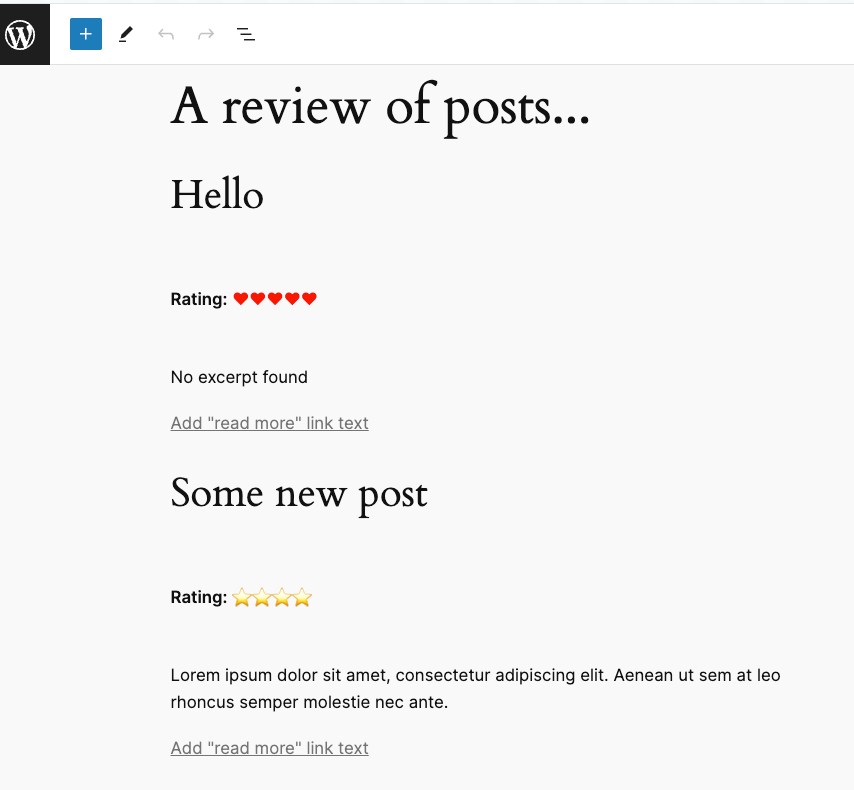
Let’s keep that going by setting up the ability to review a post or custom post type (CPT) with a rating system and include that in another custom block that can be used in a Query Loop. This could be used with your content when creators publish reviews (books, movies, products) and need a rating system to display with their posts. The end result should look like this:
Specifically, you’ll build:
A Review Card block with three specific inner blocks:
Title (core/post-title)
Rating block (a block we’ll make as well)
Excerpt (core/post-excerpt)
A Rating block that will:
Rate a post (or CPT) from one to five stars or hearts
Use post meta to store the rating
Use the block in the Post Query block to show the rating of each post.
You’ll need a local environment set up and a terminal with NodeJS installed to run commands. If you don’t already have a local environment set up, you can use wp-now, LocalWP, or another option listed here that would suit your needs.
If you would like to follow along with the finished code, it is available in this Github repo and will be updated as needed; PRs welcome!
Setting up a multi-block plugin
Let’s start with setting up our project structure. In your terminal, cd into your wp-content/plugins directory. If you’re using wp-now you can work from whichever directory you like.
Scaffold the plugin files
Run npx @wordpress/create-block@latest post-review-blocks. This will scaffold a block plugin called “Post Review Blocks” in a directory named post-review-blocks. Go into that directory and open it in your code editor of choice. You should see a post-review-blocks.php file. Open that, and your code should look like the following (without the default comments):
/**
 * Plugin Name:       Post Review Blocks
 * Description:       Example block scaffolded with Create Block tool.
 * Requires at least: 6.1
 * Requires PHP:      7.0
 * Version:           0.1.0
 * Author:            The WordPress Contributors
 * License:           GPL-2.0-or-later
 * License URI:       https://www.gnu.org/licenses/gpl-2.0.html
 * Text Domain:       post-review-blocks
 *
 * @package CreateBlock
 */

if ( ! defined( 'ABSPATH' ) ) {
	exit; // Exit if accessed directly.
}

function create_block_post_review_blocks_block_init() {
	register_block_type( __DIR__ . '/build );
}
add_action( 'init', 'create_block_post_review_blocks_block_init' );
The plugin itself should have a file structure like this:
This will create the two custom blocks needed for our multi-block setup. Note the --no-plugin to both commands. The flag indicates that this is just creating the block files, not all the plugin files needed. Also, you can see the rating-block will be a “dynamic” block, rendering with PHP. Why? This allows you to get practice with both static and dynamic blocks.
Now, there are two blocks in our src folder:
rating-block
review-card-block
You can take care of a few more things:
Go into the block.json file for the rating-block and change the “icon” property from “smiley” to “star-filled”.
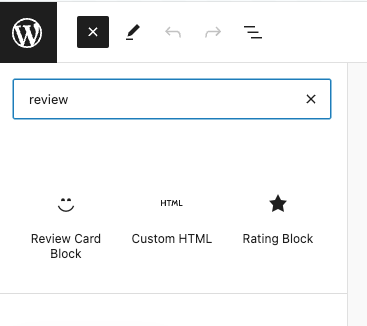
In both of the block.json files for each block, add the “keywords” property with "keywords": ["rating", "review"]. Your users will find the new blocks easier when searching.
In the post-review-blocks.php file, update create_block_post_review_blocks_block_init to register both blocks, like this:
Now, from the root of the post-review-blocks plugin (the “root” is at the same level as the package.json file), run npm start,and the blocks should build into their own sub-directories in build. You can leave this script running for the remainder of the tutorial. Alternatively, you can stop and restart it if you want to run other commands or when you make changes to files like block.json. The script needs to be running for any changes to appear in the editor.
Once the build is successful, activate the plugin either in the WordPress dashboard or via WP-CLI with wp plugin activate post-review-blocks.
At this point, you can check that the blocks are registering by creating a new post and checking the inserter for the blocks by typing in one of the keywords we used:
Success! 🎉
You now know how to set up the structure of a multi-block plugin. You can add new blocks to the src folder with create-block and register their generated scripts in the build directory.
Now it’s time to add post meta functionality, assign inner blocks, and limit where the blocks can be used.
Registering post meta
Open up the post-review-blocks.php again, and paste the following after the create_block_post_review_blocks_block_init function:
This function registers two post meta keys you will need:
_rating
_ratingStyle
These need to be registered. Otherwise, the data won’t be saved when you update our Rating block. You’ll also notice the two meta keys are prefixed with an underscore: _. This “protects” the meta from being used in the post’s custom fields section and potentially overwritten by the value in that meta box.
Finally, note that show_in_rest is set to true, and the auth_callback checks to make sure the user has at least edit_posts privileges. If the meta does not show up in the WordPress REST API, it cannot be edited in the block editor.
A quick note beyond the scope of this tutorial: Be cautious with the data shown in the REST API. If you need to filter data out of the public API, do so in PHP elsewhere or choose a different method for working with sensitive data.
Building the Rating block
The Rating block allows your users to rate a post on a scale from one to five and choose between displaying a star emoji (⭐) or a heart emoji (❤️). You can copy these emojis into your code. With this functionality, the block accomplishes two objectives:
Demonstrate how to save and pull from post meta
Allow the post meta to be used in a Query Loop Post Template
There are many applications for this kind of functionality with CPTs, including:
Staff directories with email or position meta
Book catalogs with rating or ISBN meta
Recipe indexes with tastiness or prep_time meta
The possibilities are numerous!
Ok, all the edits in this section will be within the src/rating-block directory.
Add basic CSS
The following CSS is for the styles.scss file. Open that file, remove any CSS in there, and paste in the following, which adds padding around the block and ensures the star is yellow and the heart is red.