Perform a full screen blit in URP
The example on this page describes how to create a custom Renderer Feature that performs a full screen blit.
Example overview
This example implements the following solution:
A custom Renderer Feature calls a custom Render Pass.
The Render Pass blits the Opaque Texture to the the Camera color target for the current renderer. The render pass uses the command buffer to draw a full screen mesh for both eyes.
The example includes the shader that performs the GPU side of the rendering. The shader samples the color buffer using XR sampler macros.
Prerequisites
This example requires the following:
- The Scriptable Render Pipeline Settings property refers to a URP asset (Project Settings > Graphics > Scriptable Render Pipeline Settings).
Create example scene and GameObjects
To follow the steps in this example, create a new scene with the following GameObjects:
Create a Cube. Ensure that the Cube is clearly visible from the main Camera.
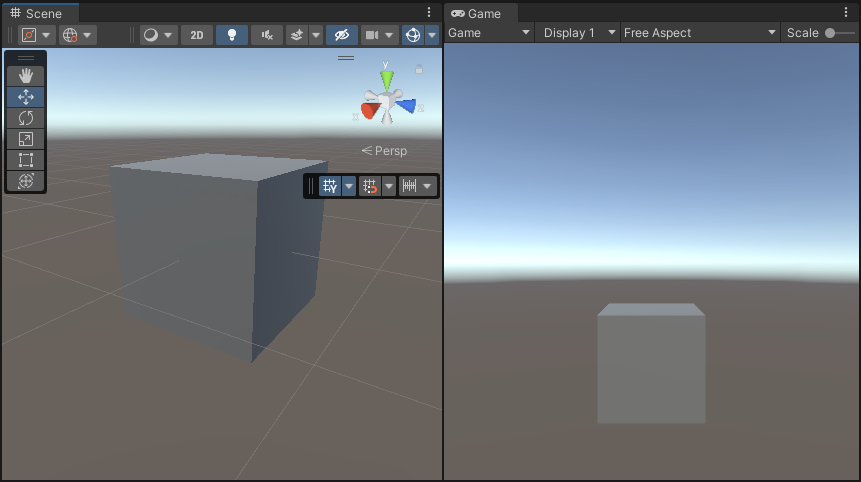
Now you have the scene necessary to follow the steps in this example.
Example implementation
This section assumes that you created a scene as described in section Create example scene and GameObjects.
Follow these steps to create a custom Renderer Feature with a custom Render Pass.
Create a new C# script. Call it
ColorBlitRendererFeature.cs. This script implements the custom Renderer Feature.using UnityEngine; using UnityEngine.Rendering; using UnityEngine.Rendering.Universal; internal class ColorBlitRendererFeature : ScriptableRendererFeature { public Shader m_Shader; public float m_Intensity; Material m_Material; ColorBlitPass m_RenderPass = null; public override void AddRenderPasses(ScriptableRenderer renderer, ref RenderingData renderingData) { if (renderingData.cameraData.cameraType == CameraType.Game) renderer.EnqueuePass(m_RenderPass); } public override void SetupRenderPasses(ScriptableRenderer renderer, in RenderingData renderingData) { if (renderingData.cameraData.cameraType == CameraType.Game) { // Calling ConfigureInput with the ScriptableRenderPassInput.Color argument // ensures that the opaque texture is available to the Render Pass. m_RenderPass.ConfigureInput(ScriptableRenderPassInput.Color); m_RenderPass.SetTarget(renderer.cameraColorTargetHandle, m_Intensity); } } public override void Create() { m_Material = CoreUtils.CreateEngineMaterial(m_Shader); m_RenderPass = new ColorBlitPass(m_Material); } protected override void Dispose(bool disposing) { CoreUtils.Destroy(m_Material); } }Create a new C# script. Call it
ColorBlitPass.cs. This script implements the custom Render Pass that performs the custom blit draw call.This Render Pass uses the
Blitter.BlitCameraTexturemethod to draw a full-screen quad and perform the blit operation.Note: Do not use the
cmd.Blitmethod in URP XR projects because that method has compatibility issues with the URP XR integration. Usingcmd.Blitmight implicitly enable or disable XR shader keywords, which breaks XR SPI rendering.using UnityEngine; using UnityEngine.Rendering; using UnityEngine.Rendering.Universal; internal class ColorBlitPass : ScriptableRenderPass { ProfilingSampler m_ProfilingSampler = new ProfilingSampler("ColorBlit"); Material m_Material; RTHandle m_CameraColorTarget; float m_Intensity; public ColorBlitPass(Material material) { m_Material = material; renderPassEvent = RenderPassEvent.BeforeRenderingPostProcessing; } public void SetTarget(RTHandle colorHandle, float intensity) { m_CameraColorTarget = colorHandle; m_Intensity = intensity; } public override void OnCameraSetup(CommandBuffer cmd, ref RenderingData renderingData) { ConfigureTarget(m_CameraColorTarget); } public override void Execute(ScriptableRenderContext context, ref RenderingData renderingData) { var cameraData = renderingData.cameraData; if (cameraData.camera.cameraType != CameraType.Game) return; if (m_Material == null) return; CommandBuffer cmd = CommandBufferPool.Get(); using (new ProfilingScope(cmd, m_ProfilingSampler)) { m_Material.SetFloat("_Intensity", m_Intensity); Blitter.BlitCameraTexture(cmd, m_CameraColorTarget, m_CameraColorTarget, m_Material, 0); } context.ExecuteCommandBuffer(cmd); cmd.Clear(); CommandBufferPool.Release(cmd); } }Create the shader that performs the blit operation. Call the shader file
ColorBlit.shader. The vertex function outputs the full-screen quad position. The fragment function samples the color buffer and returns thecolor * float4(0, _Intensity, 0, 1)value to the render target.Shader "ColorBlit" { SubShader { Tags { "RenderType"="Opaque" "RenderPipeline" = "UniversalPipeline"} LOD 100 ZWrite Off Cull Off Pass { Name "ColorBlitPass" HLSLPROGRAM #include "Packages/com.unity.render-pipelines.universal/ShaderLibrary/Core.hlsl" // The Blit.hlsl file provides the vertex shader (Vert), // input structure (Attributes) and output strucutre (Varyings) #include "Packages/com.unity.render-pipelines.core/Runtime/Utilities/Blit.hlsl" #pragma vertex Vert #pragma fragment frag TEXTURE2D_X(_CameraOpaqueTexture); SAMPLER(sampler_CameraOpaqueTexture); float _Intensity; half4 frag (Varyings input) : SV_Target { UNITY_SETUP_STEREO_EYE_INDEX_POST_VERTEX(input); float4 color = SAMPLE_TEXTURE2D_X(_CameraOpaqueTexture, sampler_CameraOpaqueTexture, input.texcoord); return color * float4(0, _Intensity, 0, 1); } ENDHLSL } } }Add the
ColorBlitRendererFeatureto the Universal Renderer asset.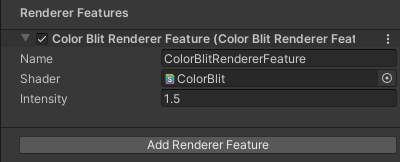
For information on how to add a Renderer Feature, refer to the page How to add a Renderer Feature to a Renderer.
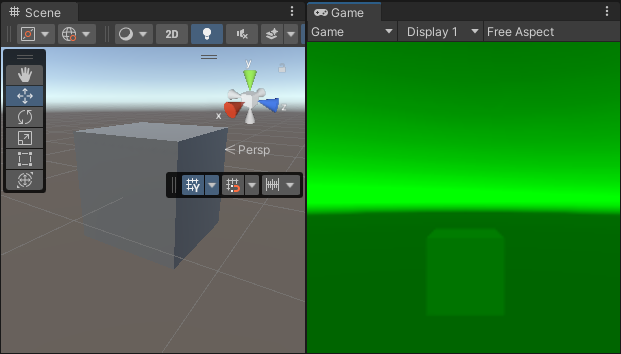
For this example, set the Intensity property to 1.5.
Unity shows the following views:
Note: To visualize the example in XR, configure the project to use XR SDK. Add the MockHMD XR Plugin to the project. Set the Render Mode property to Single Pass Instanced.
The example is complete.