Rendering Layers
The Rendering Layers feature lets you configure certain Lights to affect only specific GameObjects.
For example, in the following illustration, Light A affects Sphere D, but not Sphere C. Light B affects Sphere C, but not Sphere D.
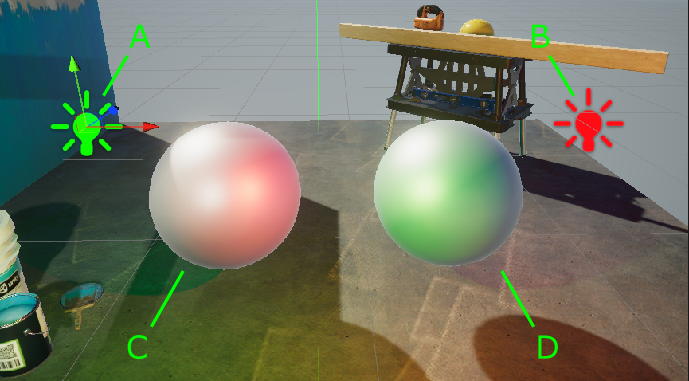
To read how to implement this example, refer to How to use Rendering Layers.
Enable Rendering Layers for Lights
To enable Rendering Layers for Lights in your project:
In the URP Asset, in the Lighting section, click the vertical ellipsis icon (⋮) and select Show Additional Properties

In the URP Asset, in the Lighting section, select Use Rendering Layers.
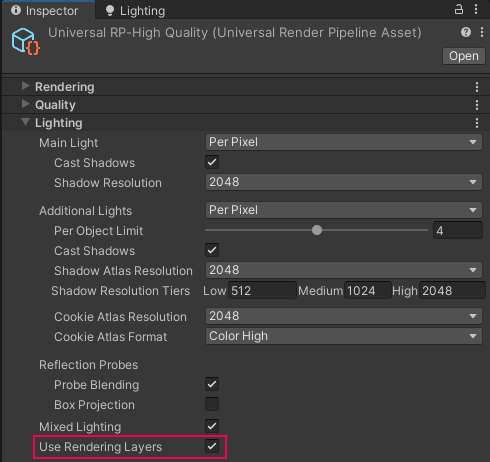
URP Asset > Lighting > Use Rendering Layers
Enable Rendering Layers for Decals
To enable Rendering Layers for decals in your project:
In the Decal Renderer Feature, enable Use Rendering Layers.

Decal Renderer Feature, Inspector view.
When you enable Rendering Layers for Decals, Unity shows the Rendering Layers property on each Decal Projector:
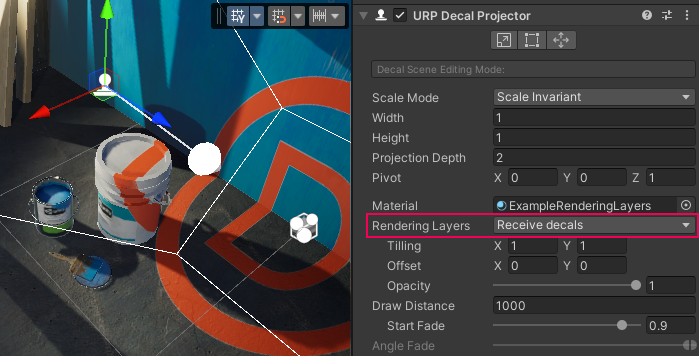
How to edit Rendering Layer names
To edit the names of Rendering Layers:
Go to Project Settings > Tags and Layers.
Edit the Rendering Layer names in the Rendering Layers section.
How to use Rendering Layers with Lights
This section describes how to configure the following application example:
The scene contains two Point Lights (marked
AandBin the illustration) and two Sphere GameObjects (CandDin the illustration).Light
Aaffects SphereD, but not SphereC. LightBaffects SphereC, but not SphereD.
The following illustration shows the example:

Light A affects Sphere D, but not Sphere C. Light B affects Sphere C, but not Sphere D.
To implement the example:
Enable Rendering Layers in your project.
Create two Point Lights (call them
A, andB) and two Spheres (call themC, andD). Position the objects so that both Spheres are within the emission range of Lights.Go to Project Settings > Tags and Layers. Rename Rendering Layer 1 to
Red, and Layer 2 toGreen.Select Light
A, change its color to green. Select LightB, change its color to red. With this setup, both Lights affect both Spheres.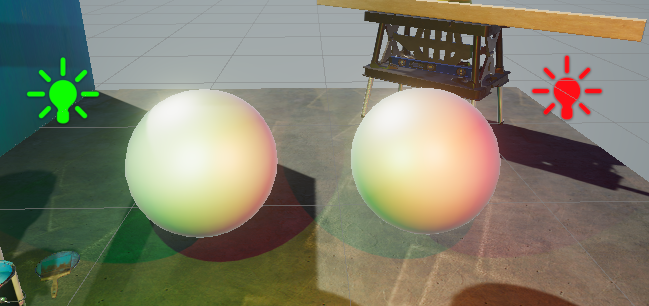
Make the following settings on Lights and Spheres:
Light
A: in the property Light > General > Rendering Layers, clear all options, and selectGreen.Light
B: in the property Light > General > Rendering Layers, clear all options, and selectRed.Sphere
C: in the property Mesh Renderer > Additional Settings > Rendering Layer Mask, select all options, clearGreen.Sphere
D: in the property Mesh Renderer > Additional Settings > Rendering Layer Mask, select all options, clearRed.Now Point Light
Aaffects SphereD, but not SphereC. Point LightBaffects SphereC, but not SphereD.
How to use Custom Shadow Layers
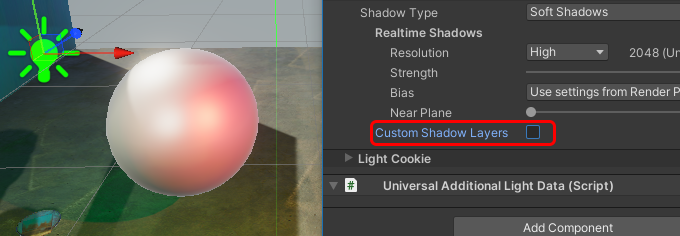
In the illustration above, Light A does not affect Sphere C, and the Sphere does not cast shadow from Light A.
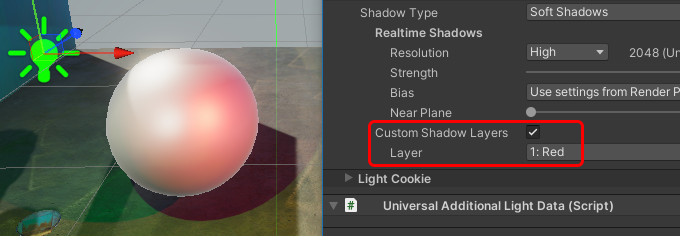
The Custom Shadow Layers property lets you configure the scene so that Sphere C casts the shadow from Light A.
Select Light
A.In Light > Shadows, select the Custom Shadow Layers property. Unity shows the Layer property.
In the Layer property, select the Rendering Layer that Sphere C belongs to.
Now Light A does not affect Sphere C, but Sphere C casts shadow from Light A.
The following illustrations show the scene with the Custom Shadow Layers property off and on.
How to use Rendering Layers with Decals
This section describes how to configure the following application example:
The scene contains a Decal Projector.
The Decal Projector projects a decal on the wall and the ground, but not on the paint bucket.
The following illustration shows the example:

In image 1, the paint bucket has the Receive decals layer selected. In image 2 it does not, so the Decal Projector does not project on the bucket.
To implement the example:
Enable Rendering Layers for Decals in your project.
Create a Decal Projector in the scene.
Go to Project Settings > Tags and Layers. Add a Rendering Layer called
Receive decals.Select the Decal Projector. In the Rendering Layers property, select
Receive decals.
Select the paint bucket GameObject. In the Rendering Layer Mask field, clear the
Receive decalslayer. Now the Decal Projector does not affect this GameObject.
Limitations
This feature has the following limitations:
- Rendering Layers are not supported on OpenGL and OpenGL ES API.
Performance
This section contains information related to the impact of Rendering Layers on performance.
Keep the Rendering Layer count as small as possible. Avoid creating Rendering Layers that you don't use in the project.
When using Rendering Layers for decals, increasing the layer count increases the required memory bandwidth and decreases the performance.
When using Rendering Layers only for Lights in the Forward Rendering Path, the performance impact is insignificant.
Performance impact grows more significantly when the Rendering Layer count exceeds a multiple of 8. For example: increasing the layer count from 8 to 9 layers has a bigger relative impact than increasing the layer count from 9 to 10 layers.